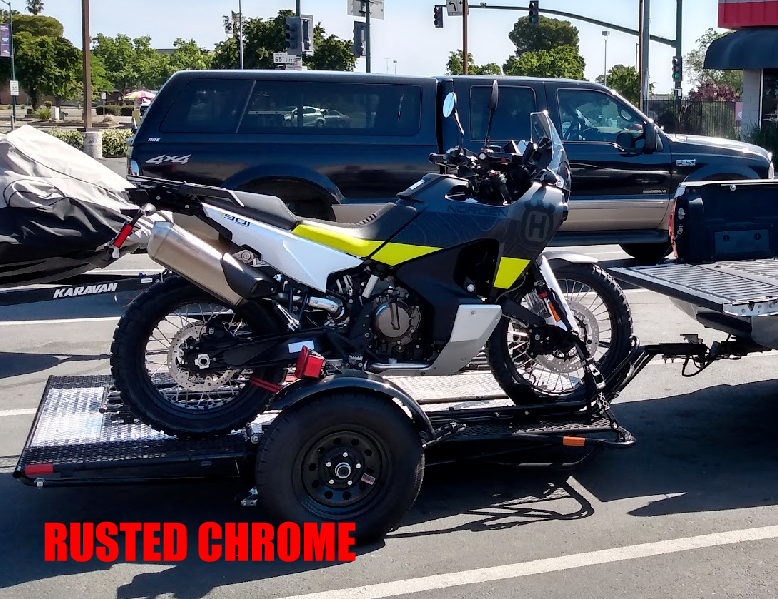
2022 Husqvarna Norden 901
Installed / added / updated components:
- Husqvarna headlight cover
- Wolfman Enduro tank bag
- WRS touring windscreen
- Outback Motortek symmetrical pannier racks (for KTM 790/890 Adventure)
- Enduristan Monsoon Evo panniers; 1x 24L and 1x 34L
- Givi TN7710 engine guards (for KTM 790/890 Adventure)
- Givi ES7712
- Tusk quiet glide skid plate
- KTM engine protection grill
- Double Take Adventure mirrors
- NiceCNC GPS mount
- Garmin Zumo XT GPS
- Sykik tire pressure monitor
- Arrow Racing de-cat mid pipe
- Barkbusters Storm hand guards
- Touratech "Works" foot pegs
- Rottweiler Performance Transaver
- Aliexpress rear brake cylinder cover
- KTM heated grips
Purchase Date: May 2022
|
Aah dirt riding. I haven't done any real dirt riding in about 30 years, that's a long time. Where I live and have lived for most of my adult life I haven't had many opportunities. I have been an avid mountain biker for some time if that counts. Anyways, the Norden has been calling my name ever since it 1st came out. I put in a deposit early in the game. Recently my number came up and I picked up my new Husqvarna!
I truly don't need another motorcycle right now. Maybe it's a COVID itch, but i need to scratch it. I want to explore some dirt trails! |
|
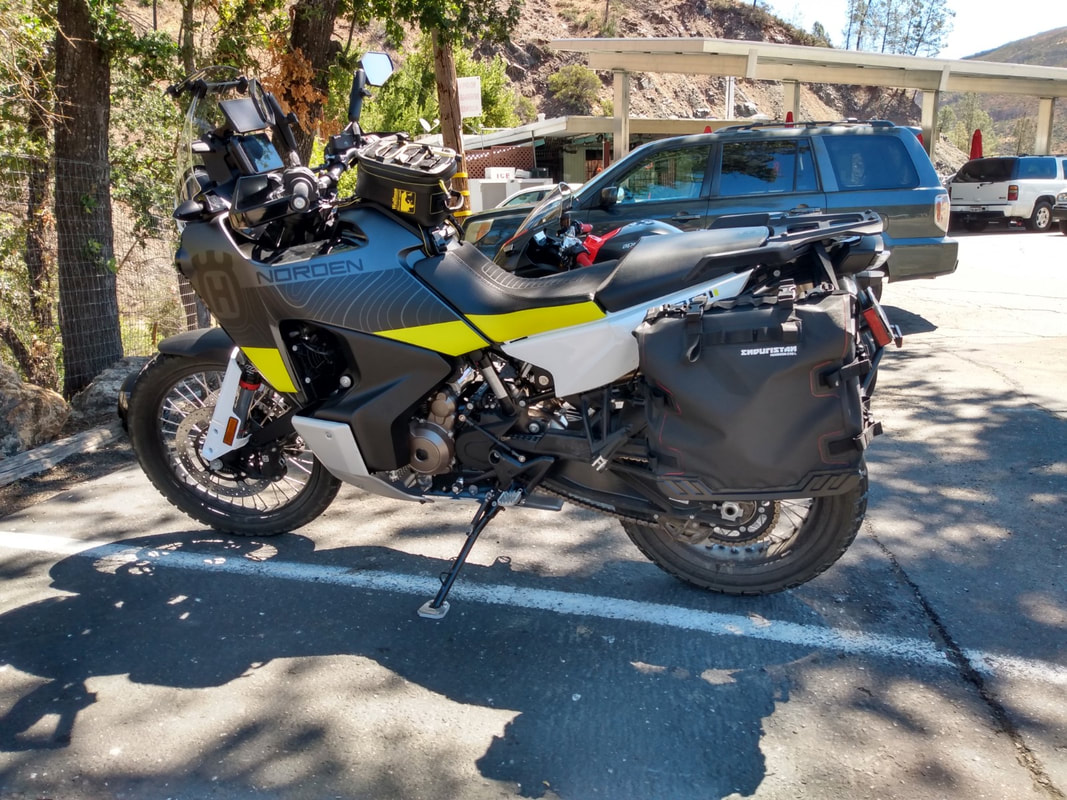
The Husqvarna Norden 901 fits the bill. It is light, or at least it feels extremely light. All of the modern motorcycle electronic do-dads are included even cruise control, shocking! It has multiple riding modes with traction control and ABS all controllable with the left hand grip switch gear, and it's easy to use.
The bike is perfect for exploring because it is light and so easy to drive. I mean, it has an up and down quick-shifter. That's seems unheard of to me (coming from pure analog motorcycles). I will always prefer the 100% visceral effects coming from an all-analog layout but sometimes it's just nice to have additional safety measures from modern technology. The Norden is one of those cases for me getting back to some dirt riding. I'm not out to bash through some single track, just to explore; and of course I have to drive long distances to my exploration destinations. Yes, the Norden will work. So much fun already. The Husqvarna Norden 901 is a strong middleweight adventure touring contender. The engine is a four stroke, liquid + heat exchanger cooled parallel twin with dual overhead cams and four valves per cylinder. 46mm throttle bodies (ride by wire) , 2 oil pumps pressure lubrication with a giant 13.5:1 compression ratio are some of the impressive engine specs on this motorcycle. 105 hp @ 8000 rpm and just shy of 74 lb/ft @ 6500 rpm of torque, good numbers for a 889cc bike. The Norden has a cable operated slipped clutch, six speed with quick shifter. 480 lbs wet and carries 5.0 US gallons of fuel. The wheels are tubeless with a 21" in front and 18" at rear. 520 X-Ring chain final drive. As far as shocks (WP APEX) , 8.6"(220mm) of travel in the front, 8.4"(215mm) at the rear. A handful of electronic aides a and gizmos to keep you riding safe is thrown into the mix on a good-sized color screen. These are just a few of the specs, there are a lot.. See the manufacture website, or just do a basic search online for the specifications and you will quickly find a complete list.
|
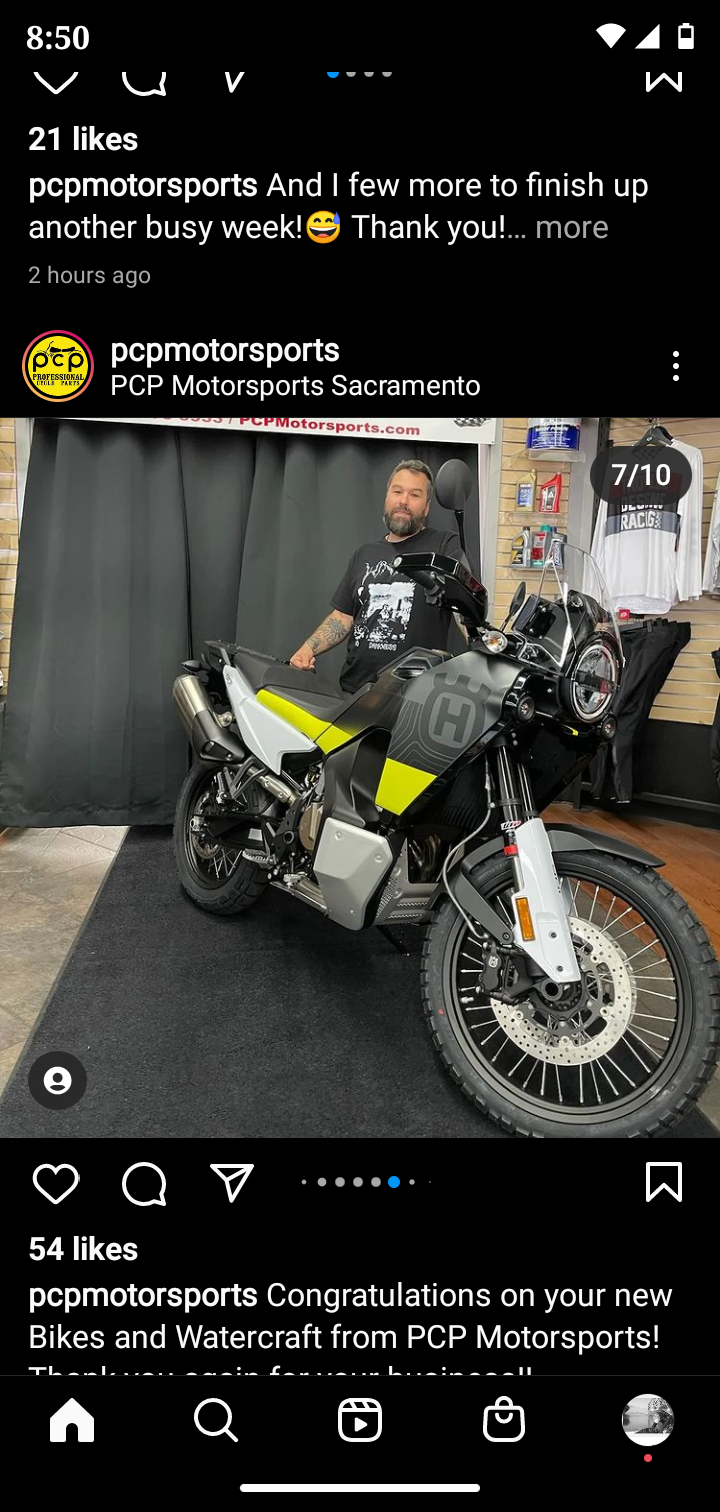
Who is this guy? - Getting gray..
|
June 2022
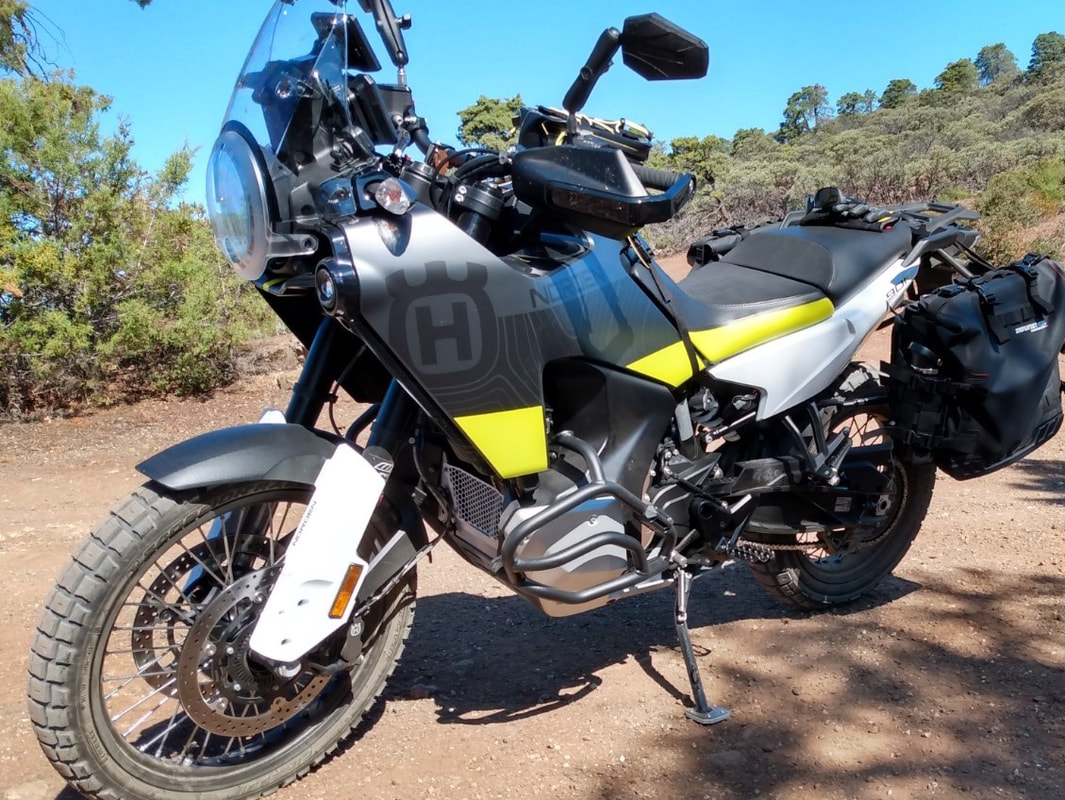
What a fun motorcycle. I've been riding around locally as much as I can, breaking in the engine and drive-train properly; patiently awaiting the 620 1st service mile mark. I've also been collecting components to add to the bike after the service. I can't wait to start building onto this base.
So far with only a few hundred miles on the bike I can best compare it to a large mountain bike. Super easy to ride and more agile than anything I've ever ridden that's this large. And you barely notice the mass. I'm looking forward to some exploration adventures with this large toy.
So far with only a few hundred miles on the bike I can best compare it to a large mountain bike. Super easy to ride and more agile than anything I've ever ridden that's this large. And you barely notice the mass. I'm looking forward to some exploration adventures with this large toy.
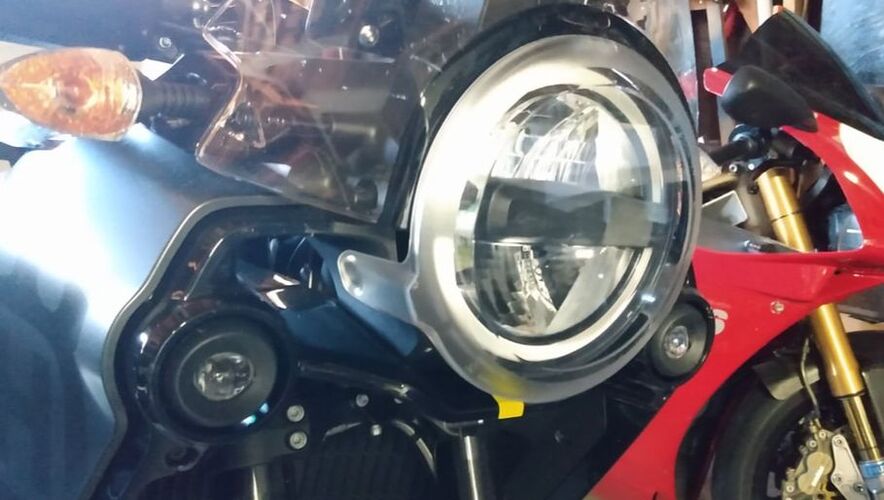
Headlight Protection, Husqvarna:
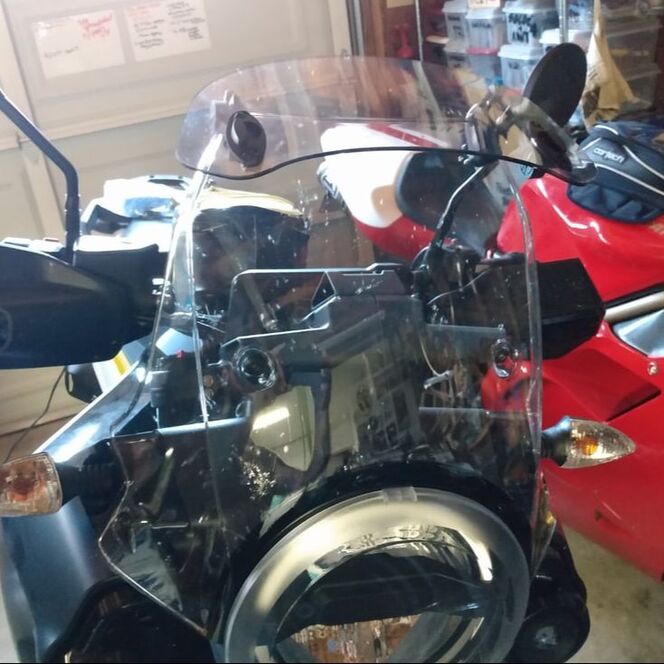
It's probably a moot topic, that of damaging my headlight. Just in case, I couldn't pass up adding a Husqvarna headlight light plastic cover to the bike. It was super easy to install and doesn't hurt the looks either.
It's probably a moot topic, that of damaging my headlight. Just in case, I couldn't pass up adding a Husqvarna headlight light plastic cover to the bike. It was super easy to install and doesn't hurt the looks either.
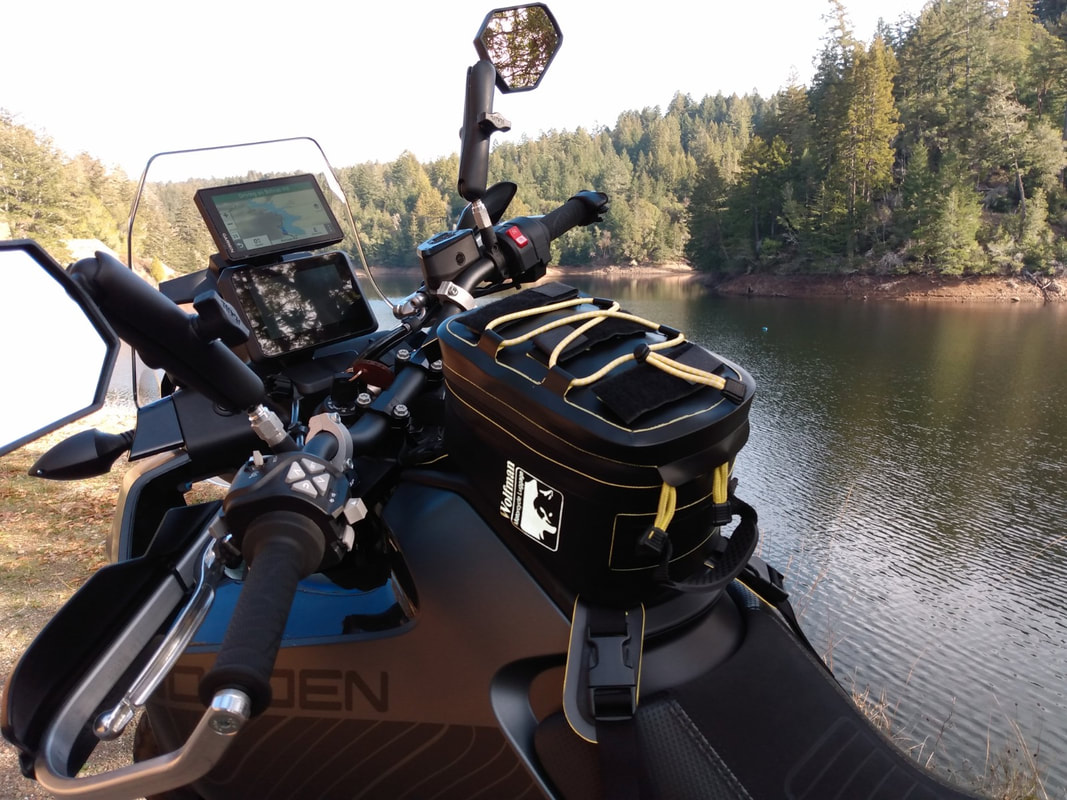
Tank Bag; Wolfman Enduro tank bag:
I've been hunting for the perfect tank bag for the Norden. I quickly found that there are plenty of options out there, it's a bit overwhelming. I, personally opted for a Wolfman Enduro tank bag for the size and water protection, not to mention the build quality.
I've been hunting for the perfect tank bag for the Norden. I quickly found that there are plenty of options out there, it's a bit overwhelming. I, personally opted for a Wolfman Enduro tank bag for the size and water protection, not to mention the build quality.
Windscreen; spoiler:
Yes, the wind buffeting is as bad as everyone says. I had one of those small clamp on windscreens laying around and decided to give it a try. After much fussing with flipping it this way and that way, I finally figured out how it works for me and I'm happy with it. But I have to admit, as soon as I see an aftermarket windscreen that looks decent I'm buying.
Yes, the wind buffeting is as bad as everyone says. I had one of those small clamp on windscreens laying around and decided to give it a try. After much fussing with flipping it this way and that way, I finally figured out how it works for me and I'm happy with it. But I have to admit, as soon as I see an aftermarket windscreen that looks decent I'm buying.
July 2022
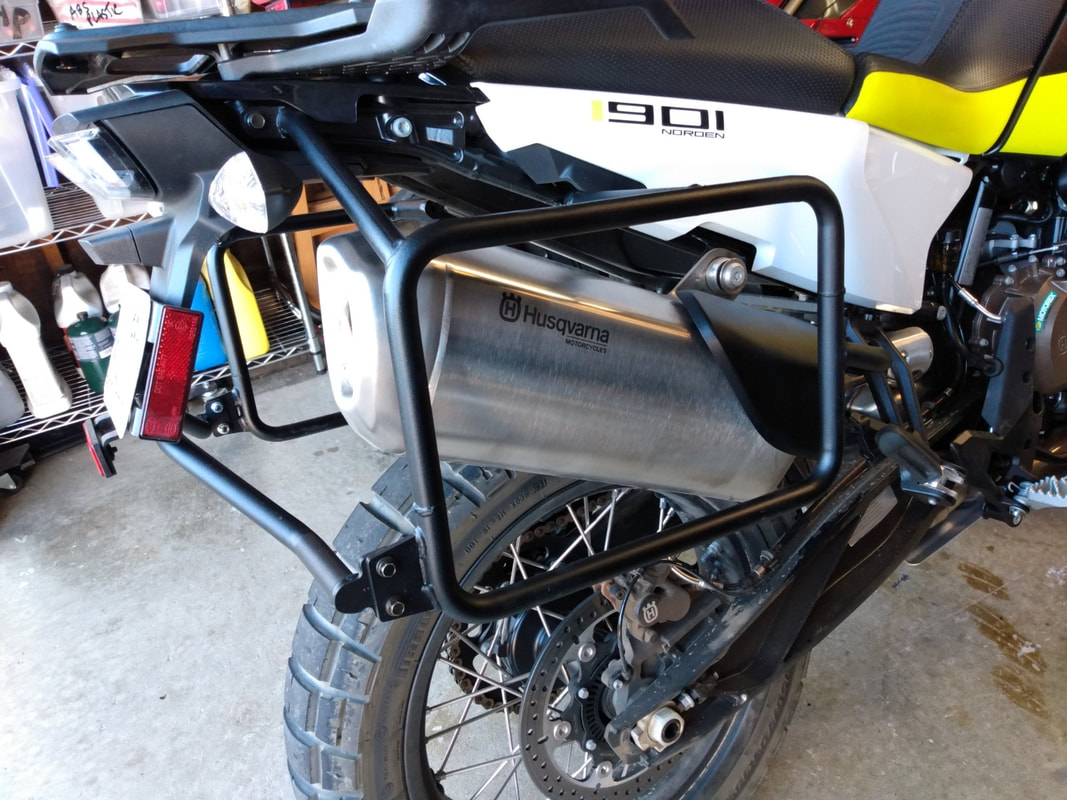
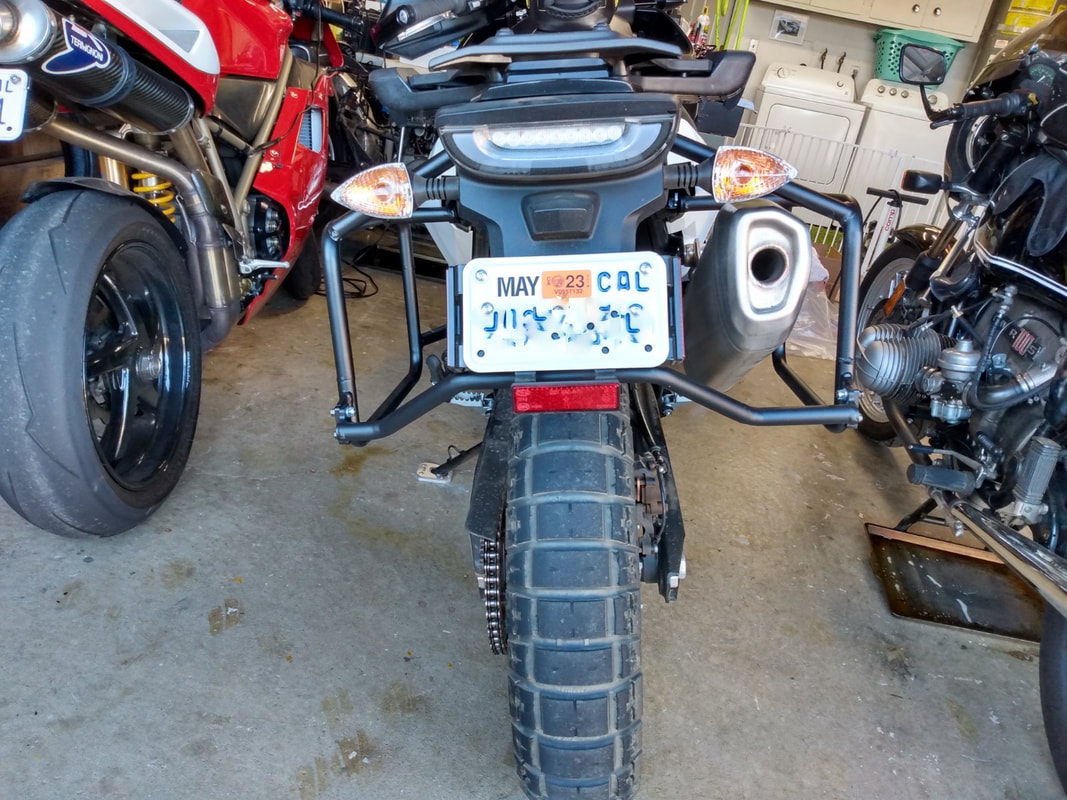
Pannier Racks; Outback Motortek Asymmetrical:
I chose these because of the quality, reputation, price, tube dia and color. Simple enough. The exact ones I have on the bike are for a KTM 790/890, they fit with slight interference on the OEM exhaust can heat shield. The heat shield can either be removed or "massaged" a bit for pannier rack fitment. Another option is to get an aftermarket muffler can. I chose the "massage" route. Very happy with them.
I chose these because of the quality, reputation, price, tube dia and color. Simple enough. The exact ones I have on the bike are for a KTM 790/890, they fit with slight interference on the OEM exhaust can heat shield. The heat shield can either be removed or "massaged" a bit for pannier rack fitment. Another option is to get an aftermarket muffler can. I chose the "massage" route. Very happy with them.
|
|
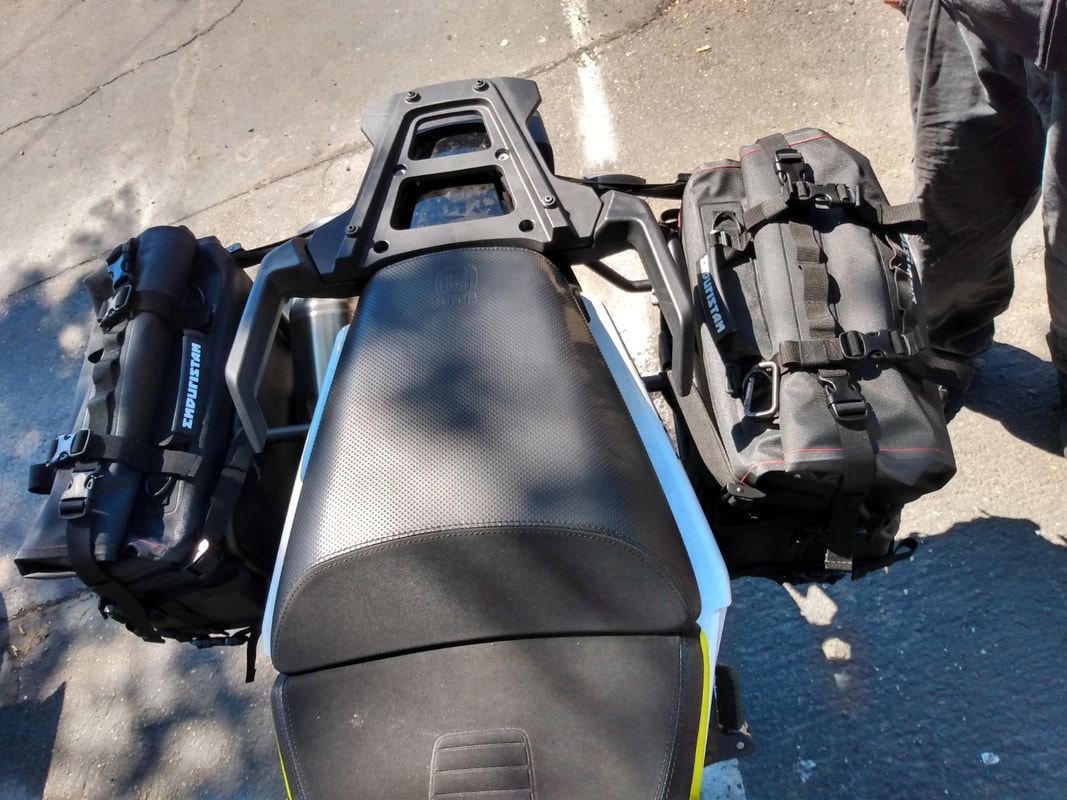
Panniers; Enduristan Monsoon Evo:
Enduristan Monsoon Evo; 1x 24L and 1x 34L - different sizes for the offset rack, keeping the bike as skinny as I can.
These are great, simple bags. Light and easy to install/remove. I am not exactly a lightweight myself and wanted to keep the back end of the bike as light as possible while adding purposeful bags. These do the trick. They are well made and appear strong enough to take a beating. So far so good.
|
|
August 2022
Mirrors; Double Take Adventure:
Listening to people on social media give a hard time about the round OEM mirrors, I gave in and purchased a set of Double Take Adventure mirrors as a replacement. I like the new mirrors, they are functional and will work great on long off-road adventures. Because of the ball-mount design I can quickly move them out of my way when not needed. Although I do personally prefer the round OEM mirrors. I think the OEM mirror quality and visibility are better, more functional for road driving.
Some people may argue that the OEM round mirrors have something to do with the poor wind buffeting. I can't agree nor deny that statement.
Engine Guards; Givi:
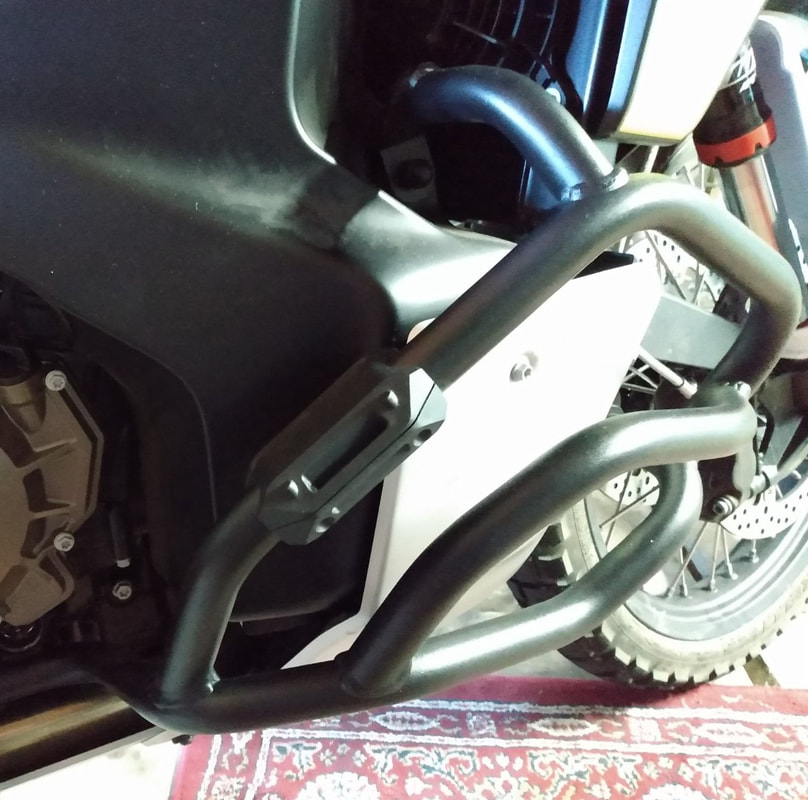
Due to the gas tank being very low on both sides of the bike, I wanted to install a set of reasonably low engine guards - to protect the plastic gas tanks. The Norden comes with thin aluminum side plates that protect the tanks and that may be enough but I wanted something that will take a significant hit. I chose to go with the Givi set that was originally designed for the KTM Adventure 790/890 series. The Givi TN7710 to be exact. I also wanted a low set that I can potentially add some highway pegs, if need be.
Givi equipment have a reputation for poor fitment with some of their products. These guards are no different. Installing these required some grinding, muscling and all out just staring at the many pieces of the puzzle while scratching your head before giving installation. There is a thick spacer that is supposed to be installed on the right side, per internet blog sites some people chose not to install this at all. I installed it on the left side because it brought the guards out close to the same distance as the right. The set in general is sturdy and I believe will take a good beating. They do add a small space for your feet if you choose to rest your feet up in another position while riding long highway miles.
All in all I'm happy with the Givi engine guards and would purchase them again. If someone reading this if purchasing them, round up some patience before the actual install for it can be frustrating. Good thing it only has to be done once.
Kickstand footprint; Givi:
The kickstand, like most motorcycles has a standard footprint for street driving. When riding offroad it's a good idea to have something that will widen the footprint so as not to sink into the mud as easily or sand, gravel, etc... I put on a simple Givi ES7712 side stand plate to take care of this. I was already purchasing the Givi engine guards and added this to the basket during my purchase. It was simple to install and functions as it should.
The kickstand, like most motorcycles has a standard footprint for street driving. When riding offroad it's a good idea to have something that will widen the footprint so as not to sink into the mud as easily or sand, gravel, etc... I put on a simple Givi ES7712 side stand plate to take care of this. I was already purchasing the Givi engine guards and added this to the basket during my purchase. It was simple to install and functions as it should.
Skid Plate; Tusk quiet glide:
Before purchasing the Norden, I was obsessed with researching everything there was out there about the bike. I watched all of the YouTube videos and was sold on the Tusk quiet glide skid plate as a replacement for the thin OEM aluminum plate. Installing the plate was honestly a bit of a nightmare. It did not go on smoothly and was a frustrating install. I think when this was designed they didn't take in consideration how thick the underside rubber bumpers are. You have to force the plate into place with the hardware during the install. I don't see that a problem, but this was quite a bit. Then there is this little cup washer that mounts behind the brake lever, a frustrating detail. You'll find out what I mean if you purchase and install one of these yourselves. It will go smoother the next time during an oil change, but that 1st time there was some swearing going on under my breath.
The plate itself is very sturdy and I can see why there are rave reviews for this. If I could do it over, I would not purchase and install the Tusk skid plate, I would look for an alternative. Although I don't plan on bashing the bottom too often. I guess it only takes once so that's why I have it for that one time that can potentially damage the bike. Admitting, I don't think the thin OEM plate would stand up to a solid blow.
Engine Protection Grill; KTM:
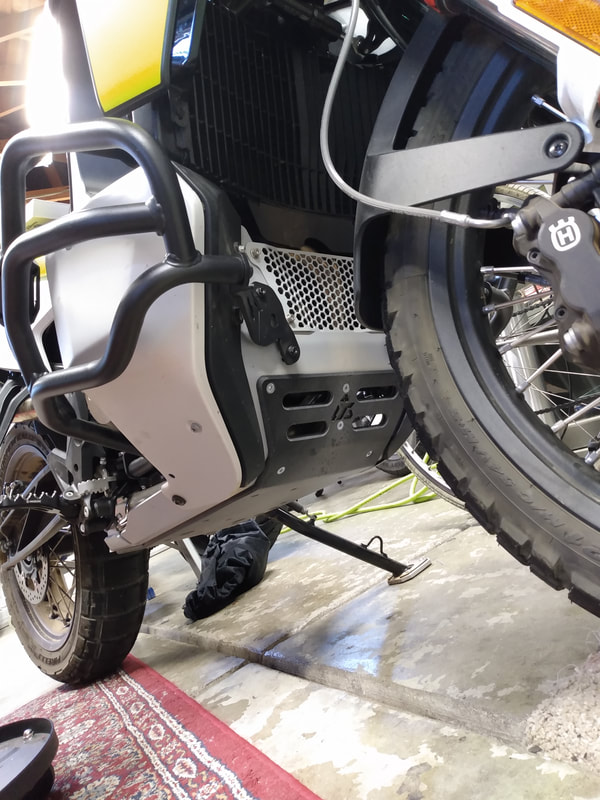
The OEM skid plate AND the Tusk skid plate both leave a giant gap between the radiator and the skid plate itself. I'm guessing this was a design consideration for airflow. I do believe both companies could have addressed this better by adding a small plate of some sort. Luckily the aftermarket world has just that, a small perforated plate that fits nicely inside the little section. The one I chose was an "Aluminum KTM engine protection grill". Like most parts for the Norden, this translates across from the KTM adventure 790/890 models and works well. My nuisance with this piece is that they give you some horrible button head screws with the kit where the head doesn't seem to fit any standard or metric hex wrenches, it's some odd size or just horribly mass produced with sloppy manufacturing processes. Anyway, I chose to drill and tap holes into the aluminum Tusk plate and use my own stainless steel metric screws. Looks so much better. Mud and road grime will not get so caked up inside the little nook anymore. Not to mention I won't find any critters nesting in there either.
The OEM skid plate AND the Tusk skid plate both leave a giant gap between the radiator and the skid plate itself. I'm guessing this was a design consideration for airflow. I do believe both companies could have addressed this better by adding a small plate of some sort. Luckily the aftermarket world has just that, a small perforated plate that fits nicely inside the little section. The one I chose was an "Aluminum KTM engine protection grill". Like most parts for the Norden, this translates across from the KTM adventure 790/890 models and works well. My nuisance with this piece is that they give you some horrible button head screws with the kit where the head doesn't seem to fit any standard or metric hex wrenches, it's some odd size or just horribly mass produced with sloppy manufacturing processes. Anyway, I chose to drill and tap holes into the aluminum Tusk plate and use my own stainless steel metric screws. Looks so much better. Mud and road grime will not get so caked up inside the little nook anymore. Not to mention I won't find any critters nesting in there either.
|
|
Footpegs; NiceCNC:
The OEM footpegs work great for day to day road use although when on the dirt they are way too small, I kept on bumping into the shifter. Just for kicks I bought the NiceCNC footpegs because of the reasonable price to try them on. They are great, I am not disappointed at all. Installation was easy once I figured out the best way to get the high tension spring back in, a wide flat head screwdriver was the trick for me.
There are lots of alternatives out there but not everything needs to be top dollar if it functions properly, as these do. If they fail for some reason I'll eat my words on this.
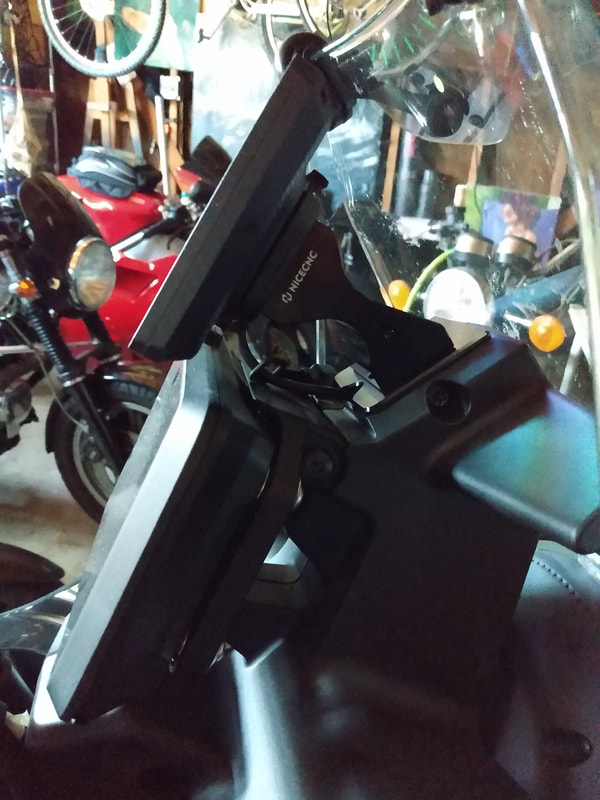
GPS Mount; NiceCNC:
Another NiceCNC part I spent my hard earned cash on is the GPS mount for my Zumo XT.
The part fits well, functions well, happy with it - simple as that.
Another NiceCNC part I spent my hard earned cash on is the GPS mount for my Zumo XT.
The part fits well, functions well, happy with it - simple as that.
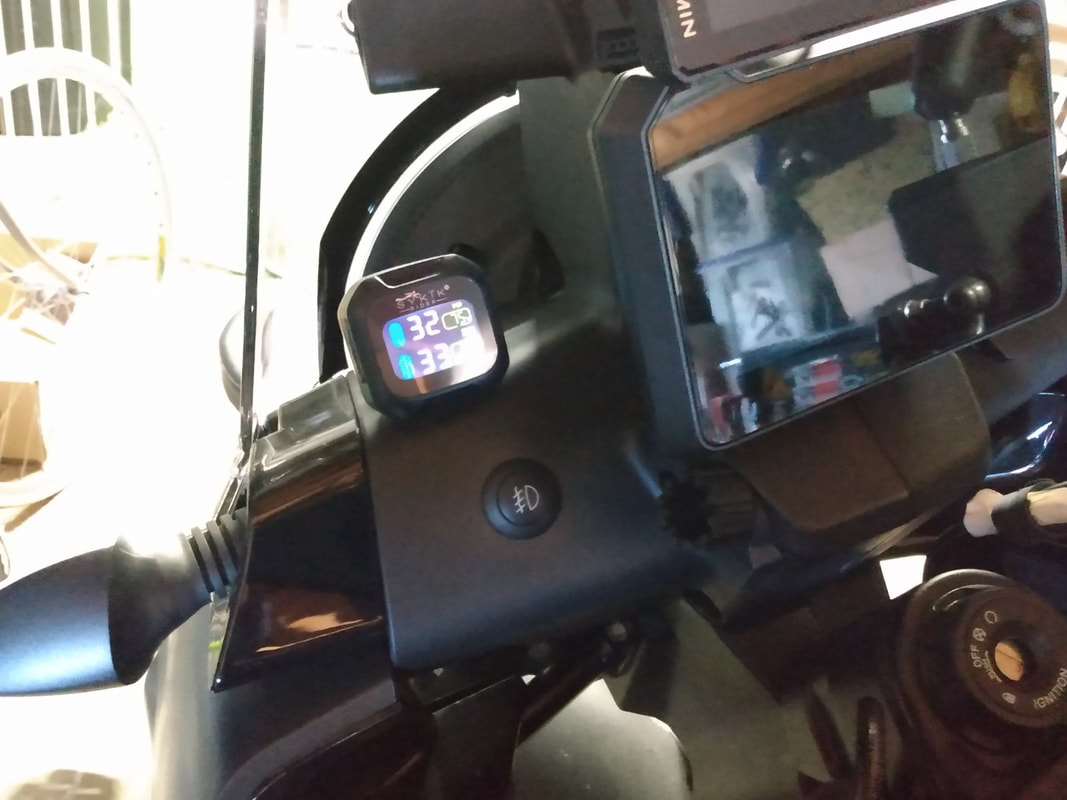
Tire Pressure Monitor; Sykik:
A simple solution to the question, "Did I just puncture my tire?" is a common question for me when off-road riding. This simple Bluetooth plug and play Sykik contraption answers that question without worrying until the next stop. All you do is screw on the Bluetooth valve caps and it automatically reads on the display. You'll need to charge the display unit although it supposedly holds a charge for a long time. There are small watch style batteries in the caps themselves as well, those are just replaced. The head unit has several mounting options, I mounted this one in a convenient spot on the "dash" of the bike. So far so good (yes, my tires are low in the image).
A simple solution to the question, "Did I just puncture my tire?" is a common question for me when off-road riding. This simple Bluetooth plug and play Sykik contraption answers that question without worrying until the next stop. All you do is screw on the Bluetooth valve caps and it automatically reads on the display. You'll need to charge the display unit although it supposedly holds a charge for a long time. There are small watch style batteries in the caps themselves as well, those are just replaced. The head unit has several mounting options, I mounted this one in a convenient spot on the "dash" of the bike. So far so good (yes, my tires are low in the image).
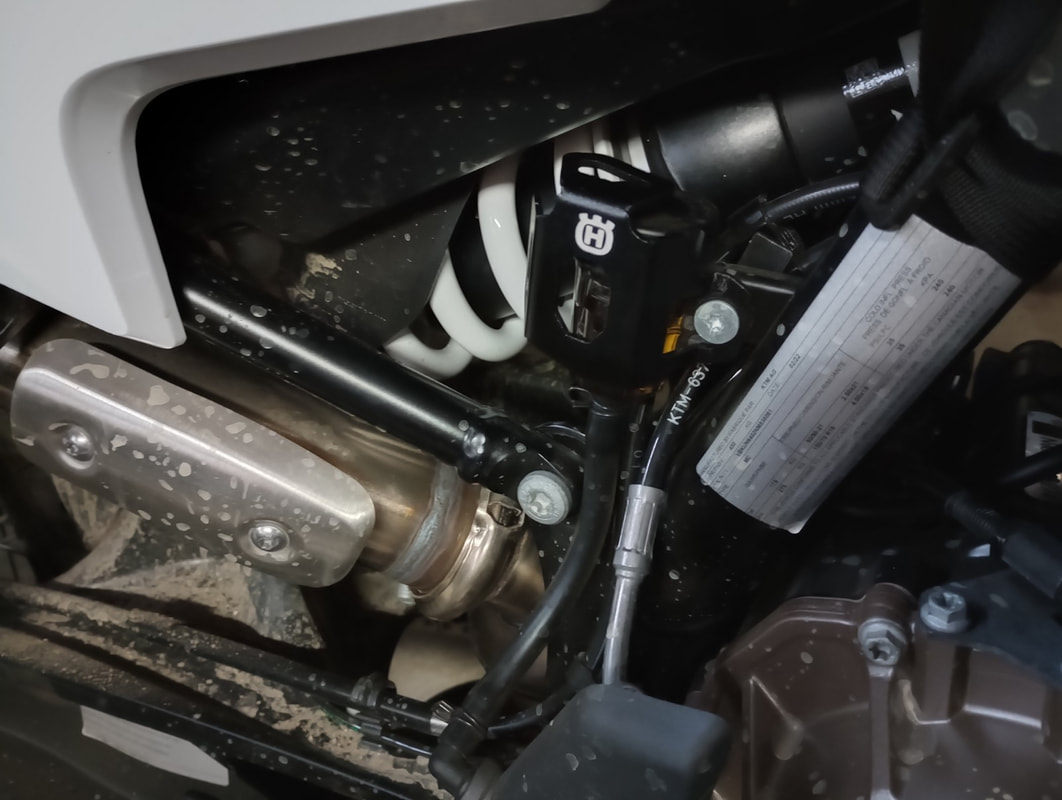
Coolant leak!
I noticed a small wet spot under the left side of the bike. I dipped my finger into the liquid and smelled it, sure enough it was coolant. I was hoping the Norden factory would've addressed this issue before mine was made, I was wrong. Luckily I've done my research long before even having the motorcycle in my possession. This is a consistent problem with many Nordens that come off the assembly line.
The culprit is a single hose clamp behind the radiator. The clamp can be accessed with a simple long flat-head screwdriver or an M6 socket on an extension. If you lay on your back with a flashlight and look up behind the radiator itself you'll see the hose clamp and accessible clamp screw. Nothing needs to come off the bike, the little nook above the OEM skid guard allows the access needed. For reference, mine was about 1/2 to 3/4 of a turn too loose which I think is significant.
After tightening the clamp, be sure check the coolant level. The level window resides just under the coolant cap if you are looking from the front of the bike, on the left side. The bike needs to be level when checking this, not on the kickstand. You'll also need a flashlight, the pink antifreeze is difficult to see and the overflow reservoir may appear empty without close inspection and some good light. Be sure to use the recommended fluid (Motorex M3.0) for top off and be forewarned that the overflow reservoir is not very big, it fills up fast! - I spilled coolant all over the fairing, found out the hard way.
October 2022
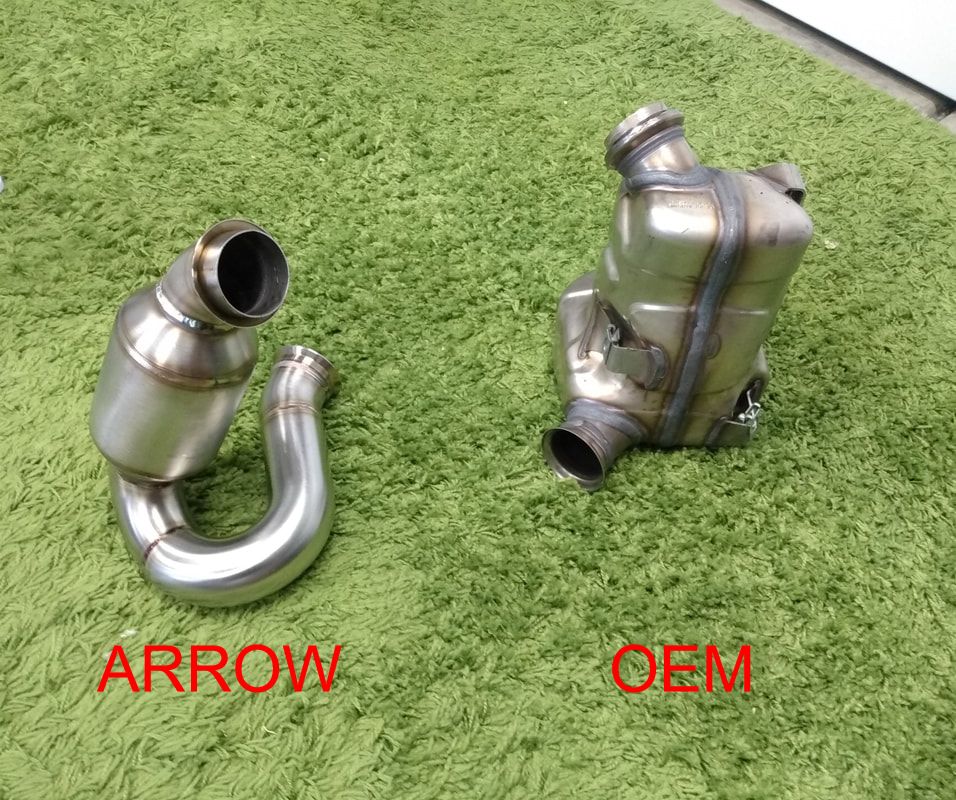
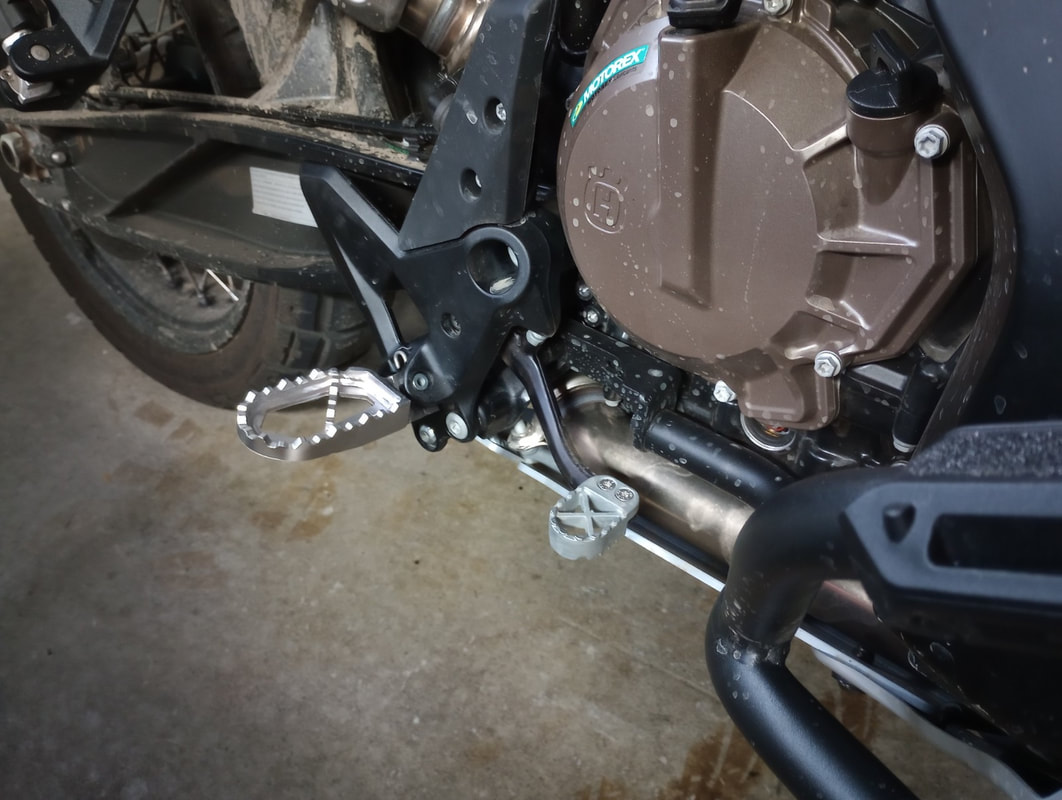
Cat Delete; Arrow:
The muffler is quiet, the bike is quiet. I found a great price on an Arrow Racing de-cat mid pipe. Installed (mildly difficult install having to rotate the tight left foot peg) and very happy with the outcome. The bike is still quiet to my standards but now has a bit of a grunt which makes me a happy boy. The OEM cat is heavy, the Arrow is reasonably light. The Arrow also runs cooler with less mass and does not heat up the rear shock as the OEM cat does. I don't plan on replacing the muffler itself, I enjoy the new raspy sound and I don't think another end can will get any gains other then weight saving.
The muffler is quiet, the bike is quiet. I found a great price on an Arrow Racing de-cat mid pipe. Installed (mildly difficult install having to rotate the tight left foot peg) and very happy with the outcome. The bike is still quiet to my standards but now has a bit of a grunt which makes me a happy boy. The OEM cat is heavy, the Arrow is reasonably light. The Arrow also runs cooler with less mass and does not heat up the rear shock as the OEM cat does. I don't plan on replacing the muffler itself, I enjoy the new raspy sound and I don't think another end can will get any gains other then weight saving.
December 2022
Handguards; Barkbuster Jet:
I've replaced the OEM handguards with a set of Barkbusters "Jet" to be exact. I chose the Jet style because I don't need much coverage, and I have a set of the storm from another bike that I can use for winter if needed. I may remove the plastic guards completely in summer and leave the aluminum backbone.
On another note. The wind buffeting is gone! It went away completely for me after replacing the handguards. I believe it was probably a combination of both the mirror swap and handguards. I'm still planning on purchasing a touring windshield for the bike when they become available, mostly for long distance high-speed freeway stints.
Loose hardware!
While passing the Norden in my garage I bumped into one of the turn signals and that's when I noticed it was loose. The turn signal was so loose it was practically dangling. All of the screws to the windshield (also secures the turn signals) were all VERY loose and needed securing. Whomever added the windshield during assembly at the dealer did not secure it correctly.
Loose spokes.
I found + tightened several loose spokes on the rear wheel after only @ 1,000 miles. Keep an eye on your spokes.
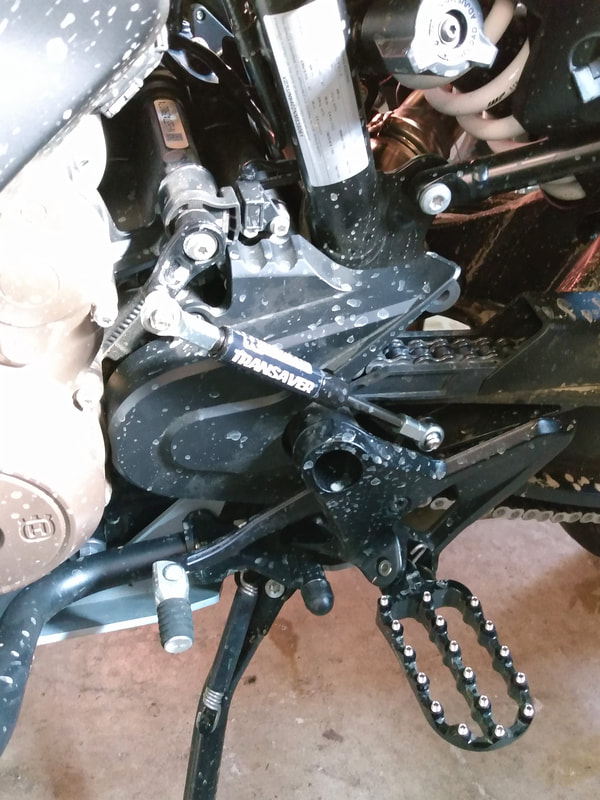
Soft-er Shifting; Transaver:
During off-road riding, I'm a little harder on the transmission. Often looking for a gear while standing and missing the shift lever, then shifting a second time with more pressure due to missing the level the first time. I bumped into this unique little gadget at Rottweiler Performance - "transaver" that adds a little bit of a cushion to the shift lever when shifting which could in the long run save the transmission. Easy installation and works like a charm. Worth noting, adding this unit eliminates a small bit of adjustment at the shift lever.
I've replaced the OEM handguards with a set of Barkbusters "Jet" to be exact. I chose the Jet style because I don't need much coverage, and I have a set of the storm from another bike that I can use for winter if needed. I may remove the plastic guards completely in summer and leave the aluminum backbone.
On another note. The wind buffeting is gone! It went away completely for me after replacing the handguards. I believe it was probably a combination of both the mirror swap and handguards. I'm still planning on purchasing a touring windshield for the bike when they become available, mostly for long distance high-speed freeway stints.
Loose hardware!
While passing the Norden in my garage I bumped into one of the turn signals and that's when I noticed it was loose. The turn signal was so loose it was practically dangling. All of the screws to the windshield (also secures the turn signals) were all VERY loose and needed securing. Whomever added the windshield during assembly at the dealer did not secure it correctly.
Loose spokes.
I found + tightened several loose spokes on the rear wheel after only @ 1,000 miles. Keep an eye on your spokes.
Soft-er Shifting; Transaver:
During off-road riding, I'm a little harder on the transmission. Often looking for a gear while standing and missing the shift lever, then shifting a second time with more pressure due to missing the level the first time. I bumped into this unique little gadget at Rottweiler Performance - "transaver" that adds a little bit of a cushion to the shift lever when shifting which could in the long run save the transmission. Easy installation and works like a charm. Worth noting, adding this unit eliminates a small bit of adjustment at the shift lever.
January 2023
Handguards continued; Barkbuster Storm:
I replaced the "Jet" style handguard covers with a set of "Storm" style I had from another motorcycle for the winter. The Storm are much better against the morning cold air and rain.
Windscreen continued; Aliexpress touring:
I've been obsessing about the touring windshield, checking for stock and arrival times from Husqvarna. Delays, delays, I finally broke down and bought an Aliexpress version, which I really didn't want to do. I just couldn't wait any longer for the folks from the north to get it together. I have to admit, I am pleased. The quality isn't bad. The shield appears to scratch easily but that doesn't bother me. It is definitely strong and functions well. It looks like a near exact replica of the Husqvarna one in pictures. I even added a black stripe on the underside near the lens made from vinyl wrap to imitate the Husqvarna version. It works great taking the bulk of the wind off of the helmet, the small vent helps prevent turbulence. As I write this, I do believe the Husqvarna version is finally available although I do not plan on replacing this one unless it breaks or I find out the Husky one has better wind protection.
Rear brake cylinder cover, Aliexpress:
While on Aliexpress purchasing the windscreen I couldn't resist spending another $7 bucks for a small cover that protects the rear brake cylinder. In my opinion this was a waste of money and it's not needed. It doesn't exactly fit right either but hey it kinda looks good. I don't know if I'll keep this on the bike or not, the jury is still out on this one.
While on Aliexpress purchasing the windscreen I couldn't resist spending another $7 bucks for a small cover that protects the rear brake cylinder. In my opinion this was a waste of money and it's not needed. It doesn't exactly fit right either but hey it kinda looks good. I don't know if I'll keep this on the bike or not, the jury is still out on this one.
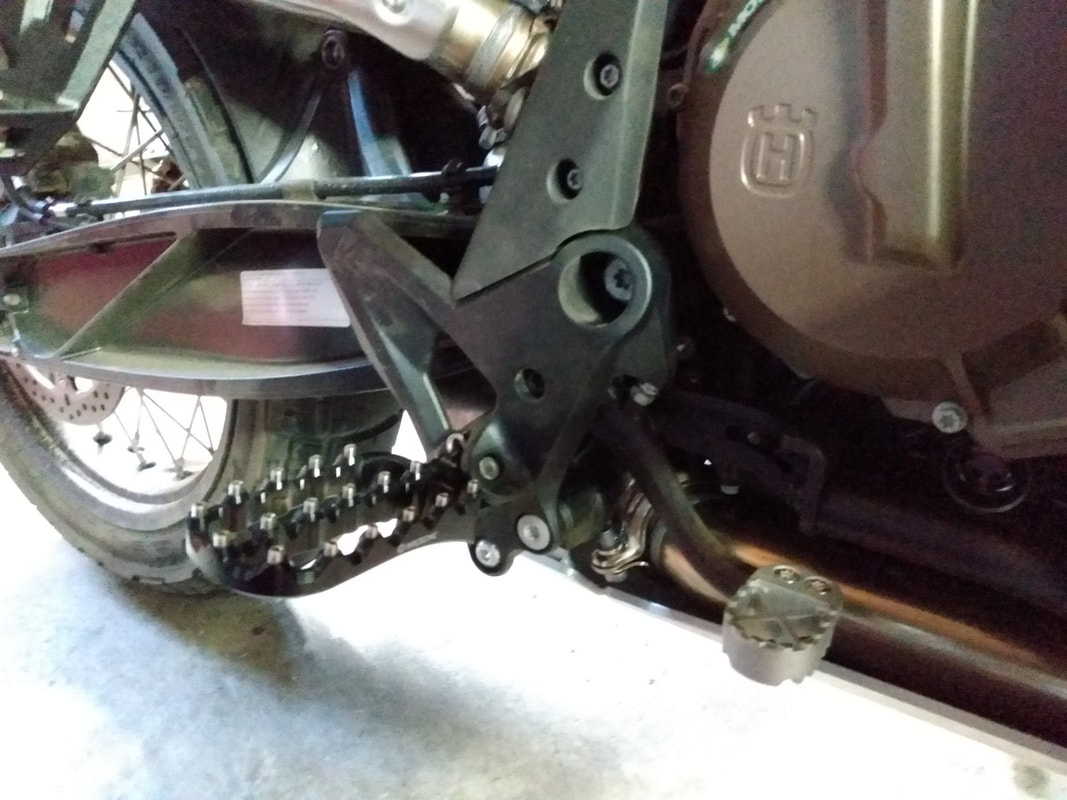
Footpegs continued; Touratech Works footpegs:
There is nothing wrong with the Nicecnc large footpegs. The problem I had is all psychological, I know they are made of a cast aluminum and that can potentially shear if bashed against a rock. This had been in my mind for some time and I couldn't let it go. I chose to purchase and install a more secure setup for peace of mind, I went with Touratech "Works" footpegs. The new pegs are slightly smaller although much stronger in durability. These are stainless steel and I believe these will hold up over the mounts on the frame. Unfortunately they are on the expensive side but they do feel great!
There is nothing wrong with the Nicecnc large footpegs. The problem I had is all psychological, I know they are made of a cast aluminum and that can potentially shear if bashed against a rock. This had been in my mind for some time and I couldn't let it go. I chose to purchase and install a more secure setup for peace of mind, I went with Touratech "Works" footpegs. The new pegs are slightly smaller although much stronger in durability. These are stainless steel and I believe these will hold up over the mounts on the frame. Unfortunately they are on the expensive side but they do feel great!
July 2023
Windshield faux-pas; Puig touring windshield:
I wanted to try the new Puig touring windshield. I purchased it from a large middleman vendor so it would be easy to return if it didn't work out. Sure enough the windshield was horrible! Way worse then even the small one that came with the bike. The problem is over 60mph buffeting starts and it is ever so slight and hits the sides of your helmet. Just enough that it vigorously shakes your head back and forth - badly and the helmet noise also increases significantly. The shaking gets worse as speed increases. After the short highway jaunt I packaged the windshield back up and returned.
One day when they become readily available I'll probably try out the expedition windshield. Until then the Ali-express version works well, I'm a stickler for a good shield.
September 2023
Another windshield / windscreen; Expedition touring windscreen:
Yup, another windshield. The Ali-express touring screen was starting to yellow around the edges, this had been bugging me and I really do like the look of the flipped up front that is on the Norden Expedition models. It also looks like there is little bit more wind coverage from the new model. I took the plunge and ordered this new touring windscreen from a Husqvarna UK dealer (still unavailable in the US). The install is easy, same as with all of the others - re-using the rubber grommets and four screws. The function, a big difference on the highway. There is a nice pocket of mild airflow right around the helmet exactly where it should be. This new screen is slightly larger than the Ali-express version in every direction with an unusual flip up at the top. Something kind of odd about the flip is that you can see your reflection against the rounded side while you are riding, this will take some getting used to. The windshield does feel a bit large but does not hinder riding at all, it is completely out of the view when standing on the pegs and not physically in the way when sitting. I hope this will be the final windscreen on my Noden 901.
Yup, another windshield. The Ali-express touring screen was starting to yellow around the edges, this had been bugging me and I really do like the look of the flipped up front that is on the Norden Expedition models. It also looks like there is little bit more wind coverage from the new model. I took the plunge and ordered this new touring windscreen from a Husqvarna UK dealer (still unavailable in the US). The install is easy, same as with all of the others - re-using the rubber grommets and four screws. The function, a big difference on the highway. There is a nice pocket of mild airflow right around the helmet exactly where it should be. This new screen is slightly larger than the Ali-express version in every direction with an unusual flip up at the top. Something kind of odd about the flip is that you can see your reflection against the rounded side while you are riding, this will take some getting used to. The windshield does feel a bit large but does not hinder riding at all, it is completely out of the view when standing on the pegs and not physically in the way when sitting. I hope this will be the final windscreen on my Noden 901.
More loose screws:
After a long ride bashing through some rock sections I noticed that the brake lever peg attachment was loose. All I had to do was tighten the two small screws, but still in all it is something to keep an eye on. They could use some blue thread locker.
After a long ride bashing through some rock sections I noticed that the brake lever peg attachment was loose. All I had to do was tighten the two small screws, but still in all it is something to keep an eye on. They could use some blue thread locker.
October 2023
Immobilizer failure, or?
I was driving along (as one usually does) when all of a sudden the bike shuts off and the displays "immobilizer failure". The bike will not start; then after a few seconds I turn the key again and it starts with the service light on. I drove the bike a few hundred yards to a shady parking lot where I can diagnose this via the internet. Good thing I had service where I was, albeit it was spotty. Using a google search "immobilizer Norden 901" the blogs came back with responses of this and that about the key-immobilizer unit being faulty, connections loose, random error code that goes away, diconnect the battery then reconnect it again; weird. I wiggled the wiring harness near the key switch pushing the connectors together and looking for tight spots. Nothing obvious, I turned the key and started the bike; the error code was gone. I rode 300+ miles since then and no sign of the immobilizer error code. Fun stuff!
I was driving along (as one usually does) when all of a sudden the bike shuts off and the displays "immobilizer failure". The bike will not start; then after a few seconds I turn the key again and it starts with the service light on. I drove the bike a few hundred yards to a shady parking lot where I can diagnose this via the internet. Good thing I had service where I was, albeit it was spotty. Using a google search "immobilizer Norden 901" the blogs came back with responses of this and that about the key-immobilizer unit being faulty, connections loose, random error code that goes away, diconnect the battery then reconnect it again; weird. I wiggled the wiring harness near the key switch pushing the connectors together and looking for tight spots. Nothing obvious, I turned the key and started the bike; the error code was gone. I rode 300+ miles since then and no sign of the immobilizer error code. Fun stuff!
December 2023
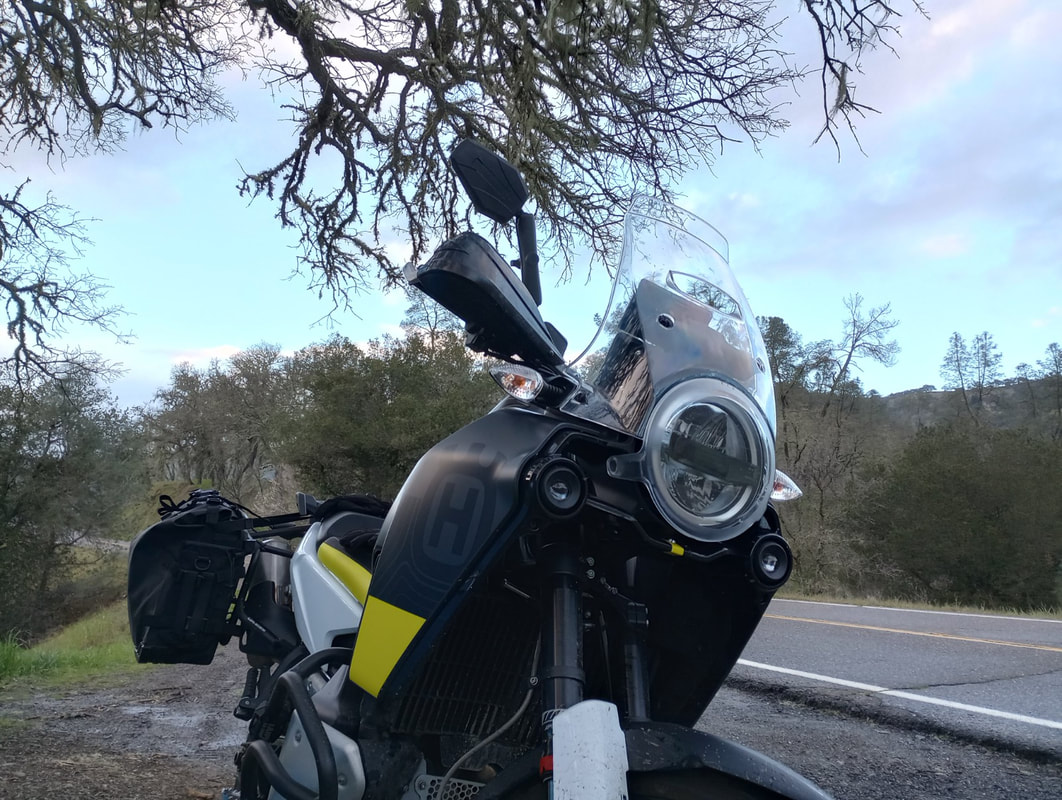
Not another windscreen! ; WRS touring windscreen:
Yes, yet another windscreen. After riding for a few months I was unhappy with the expedition touring windshield. It makes an irritating humming buffeting at the peak of my helmet. I know it's a small nuance but it's those little things that can drive a person crazy.
In my searches I discovered the WRS Norden 901 touring windscreen. Finally more manufacturers are getting on board and making windscreens for this bike. Seems like it took a long time.
This one works for me. I'm keeping this one on the bike (i think so).
The WRS windscreen is wide at the bottom mounting and isn't too tall like the Husqvarna touring windscreen. That one was a bit tall for off-road riding (in my opinion). It is not too low like the OEM either, sort of that sweet spot. The WRS version does not make a silent spot in front of the rider, instead it keeps the wind moving without any weird buffeting vortexes shaking your helmet all over the place. It's just the wind on your helmet, not a bad thing. Air is deflected away from your chest and shoulders nicely.
I certainly do hope this is the last windscreen for the bike.
No more cold hands; KTM heated grips:
I finally installed a set of heated grips on the Norden.
Husqvarna Norden heated grips have been on backorder for a long time. My impatience and the cold weather forced me to source an alternative brand set. The closest available without handgrip modification is the KTM style, these have a small control unit that mounts to the handle bar instead of going through the bike's computer settings. I actually prefer this style although wiring these up took a bit of thought.
Wiring the KTM 790/890 Adventure heated grips requires a set of ignition switch controlled positive + negative wires. There are two sets of these on the bike, one is under the gps (for the gps) and the other is under the pillion passenger seat; I believe for a heated seat. There are two more sets of wires that have power on all the time (constant power) running parallel to these at the same locations. I am sticking with the switched wires myself to keep things simple and preventing a potential accidentally drained battery from leaving the grips on.
Because one wire set is already used for the gps, this leaves me with two solutions. One is to use the constant power wire set and add a relay that turns this off when the key switch is off. Alternatively I can use the open (switched) connectors that are under the pillion seat; this is the option I chose. I basically made a set of 16 gauge extension wires with connectors that run under the seat and fuel tank up to the neck of the frame where the wiring harness bundle sits and there's room to stuff any extra wire. All set-up and connected, done.
The heated grips work, they are not as hot as others I've used but they are good enough for my use. The control is simple to use and temperature adjustments are an easy click of the button.
Photos and details of the Norden 901 will be added as the project matures.