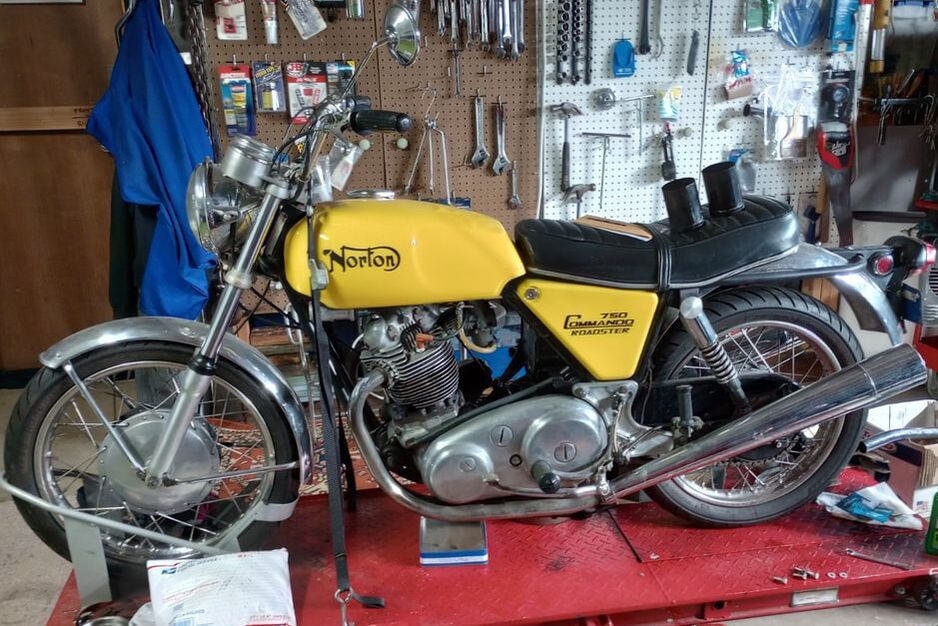
1970 Norton Commando 750 Roadster
Purchase Date: February 2023
When I was a young kid my father had an early 70's Norton Commando Roadster that was stolen. I have very few memories of the stolen Norton, I was very young. Because of this faded memory I've been loosely chasing down a budget-friendly Commando to commemorate my father and have some fun while doing so. He has long since passed on (2001).
|
Norton Norton Norton...
Most of my adult life while working on and collecting motorcycles the Norton Commando has been evading me, until now. 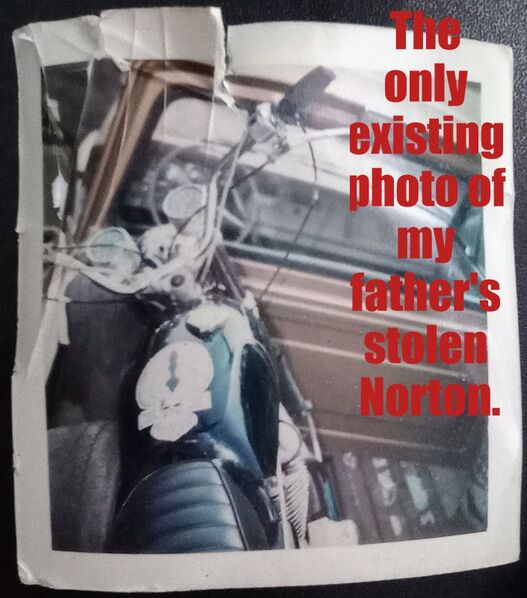
|
Norton motorcycles have a cult-like following and the value of them as of recent times has been rising. Collectors are snatching them up quickly making them both difficult to find and expensive.
There have been a few Nortons over the years that I passed on purchasing, some I regret the missing the opportunity and others I am glad I didn't fall for.
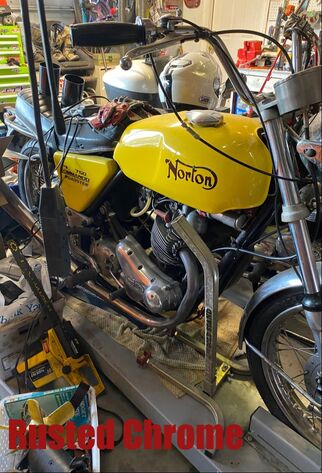
When this yellow (not for long yellow) Roadster showed up in an email thread while looking for a pre-'70 Triumph T120 for a local ride, my interest was peaked. After a few back and forth discussions with the owner and some careful deliberation with my wife I pulled the trigger and bought the bike.
There have been a few Nortons over the years that I passed on purchasing, some I regret the missing the opportunity and others I am glad I didn't fall for.
When this yellow (not for long yellow) Roadster showed up in an email thread while looking for a pre-'70 Triumph T120 for a local ride, my interest was peaked. After a few back and forth discussions with the owner and some careful deliberation with my wife I pulled the trigger and bought the bike.
This Roadster needs some work. It is not trashed, although far from mint condition at the same time. I am not doing a full restore on this. The bike will be a reliable driver as I tend to make most of the bikes I work on. The trick for me is to get this up to tip-top running condition in a few months for a 1k ride in late June.
The 1970 Norton Commando 750 Roadster has 56 horsepower with a top speed of 116 miles per hour. The engine is a 745 cubic centimeter air cooled overhead valve twin with a bore and stroke of 73mm x 89mm with an 8:1 compression ratio. The Norton is not too heavy at 398lbs dry. The bike has a fairly small, but gets the job done 3.2 gallon steel gas tank producing a claimed 45-50 miles per gallon.
The 1970 Norton Commando 750 Roadster has 56 horsepower with a top speed of 116 miles per hour. The engine is a 745 cubic centimeter air cooled overhead valve twin with a bore and stroke of 73mm x 89mm with an 8:1 compression ratio. The Norton is not too heavy at 398lbs dry. The bike has a fairly small, but gets the job done 3.2 gallon steel gas tank producing a claimed 45-50 miles per gallon.
February 2023
I have not started the bike yet, have not heard it running; don't even know if it runs. This bike will get a thorough once over before attempting to start it. First things first and I will go over / fix what I can while waiting for parts.
Mufflers:
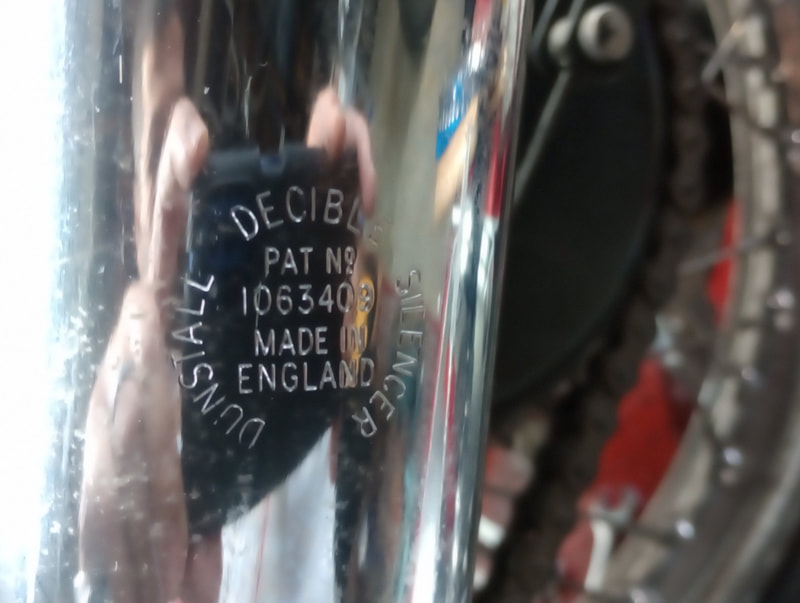
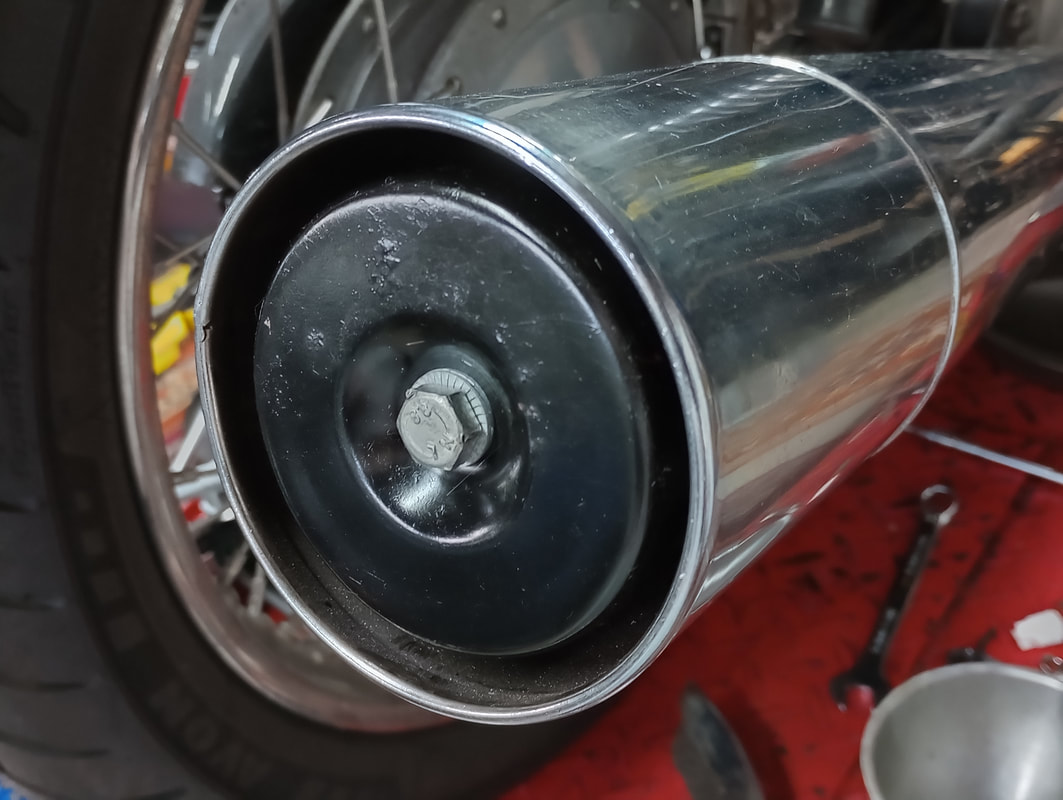
The previous owner removed the Dunstall baffle caps (yes, original Dunstall mufflers) and was going to drill holes in the ends, he never got to it. I'm glad he didn't, they would be near impossible to replace. I do plan on making a set in the future that replace the caps but for now I just cleaned up and re-installed the end caps (no actual baffle fibers). I can't wait to hear how this bike sounds!
The previous owner removed the Dunstall baffle caps (yes, original Dunstall mufflers) and was going to drill holes in the ends, he never got to it. I'm glad he didn't, they would be near impossible to replace. I do plan on making a set in the future that replace the caps but for now I just cleaned up and re-installed the end caps (no actual baffle fibers). I can't wait to hear how this bike sounds!
|
|
Headlight:
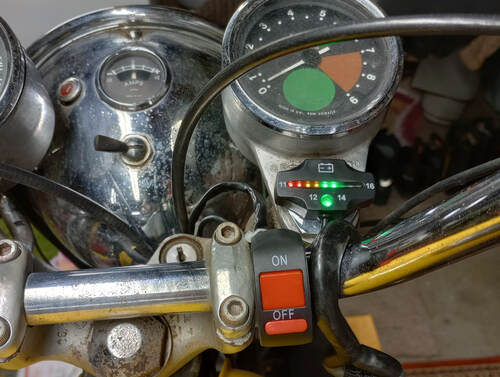
The headlight didn't work. Inside the headlight shell, which is surprisingly clean I tested the wire leads in different switch configurations. All looks good with the exception that one of the positive ground wires lost it's place neatly in one of the connectors. I crimped the wire back into place and replaced the bulb with a 6v / 12v modern P36D LED bulb and voila, we have light. At that point I disconnected (and safeguarded) the high beam wire from the light shell switch so I can use the low beam with the instrument lights and tail light at the same time.
The headlight didn't work. Inside the headlight shell, which is surprisingly clean I tested the wire leads in different switch configurations. All looks good with the exception that one of the positive ground wires lost it's place neatly in one of the connectors. I crimped the wire back into place and replaced the bulb with a 6v / 12v modern P36D LED bulb and voila, we have light. At that point I disconnected (and safeguarded) the high beam wire from the light shell switch so I can use the low beam with the instrument lights and tail light at the same time.
|
Voltage:
I suspect this bike might be a bugger with charging so I want to keep an eye on it, at least for a bit until I get to know the motorcycle. I added a small voltmeter and switch that I had in spares from working on other bikes to the headlight power line. Now I can check the voltage anytime. It is small things like this that may save me lots of headaches down the line. |
|
March 2023
Speedometer cable:
The cable that came with the bike appears original. It is broken and appears to have been that way for a long time. I sourced and installed a 69" SBK cable, the cable is a perfect fit and feels durable.
Keys:
The bike only came with one key, honestly I'm glad to have one. I purchased a spare from motokeys.com using the key code listed on the single key I have. Upon receiving, the key fits perfectly.
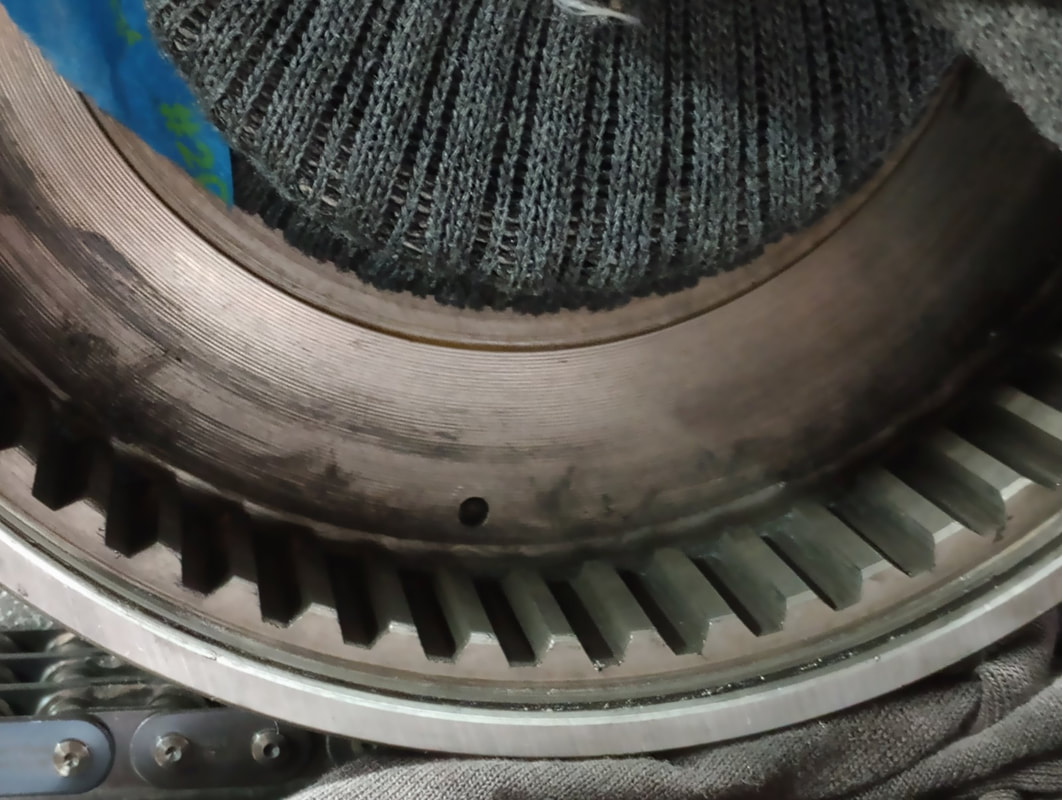
Clutch bits:
Not to my surprise, while removing the clutch plates to free them from being stuck in a thick oil goo, I discovered that the small clutch plate pins had been sheared. This is apparently a common problem with the early Commandos only having two small pins. I carefully drilled out the old brass/bronze pins, then sourced a set of new pins of which I had to grind down a few thousandths from the length to prevent them from interfering with the adjacent running friction plate. Installation was fairly simple after cleaning everything up.
Also, the primary chain was showing signs or rubbing against the backside of the chain case. Upon further investigation, someone placed the spacer washer that was supposed to be behind the clutch - in front of the clutch. Fixed.
I installed a new set of Barnett friction plates and steel discs, keeping the stock configuration.
|
|
Light switch:
The light switch on the left handlebar was in questionable working condition. I removed the switch body and started cleaning the contacts which is when a piece of the body broke in my hand. It looks like it was Bakelite or a similar material that didn't hold up over the years. I ordered and installed a new one with solid connections that is for a Japanese bike from Common Motor Collective, works great!
The light switch on the left handlebar was in questionable working condition. I removed the switch body and started cleaning the contacts which is when a piece of the body broke in my hand. It looks like it was Bakelite or a similar material that didn't hold up over the years. I ordered and installed a new one with solid connections that is for a Japanese bike from Common Motor Collective, works great!
April 2023
Points:
The left cylinder points were permanently closed. I installed 2x new sets of points and delicately adjusted.
The bike has not been started yet, still going through all of the small details getting things straight before attempting a start.
The left cylinder points were permanently closed. I installed 2x new sets of points and delicately adjusted.
The bike has not been started yet, still going through all of the small details getting things straight before attempting a start.
Carburetors:
I reset the Amal carbs to the suggested base settings per the manual and added a slick dual carb air filter. Getting close to starting!
I reset the Amal carbs to the suggested base settings per the manual and added a slick dual carb air filter. Getting close to starting!
Fluids:
Drained and filled all fluids. Good thing I did, the sump oil strainer was fairly dirty, borderline clogged with oil clumps.
Drained and filled all fluids. Good thing I did, the sump oil strainer was fairly dirty, borderline clogged with oil clumps.
I kicked the kick-start lever several times with a few burbles every time and no fire. Frustrating. Fuel yes, air yes, spark yes, good ground - no... Grrr...
I traced all the wires along the whole bike and updated some of the connections that were barely hanging on. Others connection points were poor from a previous owner. Cleaned it all up. This may need a new complete harness in the future.
I attempted another start, success! Granted it wasn't easy, the bike is alive. Made some carburetor adjustments and pushed the bike outside for a short test drive.
Driving the Norton with a strange (to me) shift pattern on the right side was at first a bit confusing but I picked it up quickly. The carburetors felt worn, they do not respond as quickly as I'd like. An intermittent loud squealing came from the speedometer. The steering head was loose. All these items easily remedied with some tightening, lube and maybe a carburetor rebuild is in the cards. The Norton goes back on the lift.
May 2023
Tail rack, extra fuel:
This bike is going to go on some long trips, long enough as to where I'm going to need more gas than what the fuel tank can hold. (Enter creative thinking) I had an old tail rack for a Guzzi laying on the shelf, I bent it up a little bit and found a non-destructive way to install using some frame clamps. I also had a Rotopax fuel can and setup laying around, added this to that and that to this, voila; we have a tail rack and some 1 gallon fuel cans.
This bike is going to go on some long trips, long enough as to where I'm going to need more gas than what the fuel tank can hold. (Enter creative thinking) I had an old tail rack for a Guzzi laying on the shelf, I bent it up a little bit and found a non-destructive way to install using some frame clamps. I also had a Rotopax fuel can and setup laying around, added this to that and that to this, voila; we have a tail rack and some 1 gallon fuel cans.
Tank and covers:
I don't care for the OEM yellow color, the tank has bad rust bubbles under the paint, and the side panels are holding on with zip ties; this tank and cover set has to go (for now). I scoured the internet and purchased an inexpensive dark blue tank and side cover set that I liked. Unfortunately the side covers didn't fit correctly, I adjusted them and added attachment brackets with rivets; now they fit great. The new tank needed some fitment work as well along with an extra spring under the tank cap to seal, I got all this squared away and installed.
The new tank and panel set look good although the new tank is a bit smaller than the OEM and I prefer the OEM size. In the future I plan to re-paint the OEM set black and re-install, still debating which side covers to keep.

June 2023
Electronic ignition:
The points are frustrating to set just right and the left side was giving me problems. I finally opted to go the easy route and install an electronic ignition. After researching which is preferred, Tri-Spark comes out at the top of the list. So, Tri-Spark electronic ignition it is, I also ordered a set of their coils and a new set of plug wires that could handle the load. The install was fairly straight forward and the final result is a clean, strong reliable spark. No more dealing with those fussy points.
During the install, upon removing the plugs I found the ones installed were wrong! I don't know how someone messed this up, so the new, correct, simple B7ES plugs are now installed.
Carburetor convesion:
The Amals were sloppy and I wanted to simplify things so I purchased and installed a single VM34 carb along with the conversion kit from Mikunioz. Very happy with this kit and it was easy jet without any problems. The most difficult thing was that I had to make a cable from scratch for fitment.
I could've simply purchased a rebuild kit for the Amals but I didn't want to deal with it. The right side carb air screw was all the way in while running and something suspicious was going on, didn't want to chance the rebuild and have more issues down the line.
Oil feed lines:
One of the rocker oil feed lines burst while driving. Ordered and installed a set of Venhill stainless steel braided lines.
One of the rocker oil feed lines burst while driving. Ordered and installed a set of Venhill stainless steel braided lines.
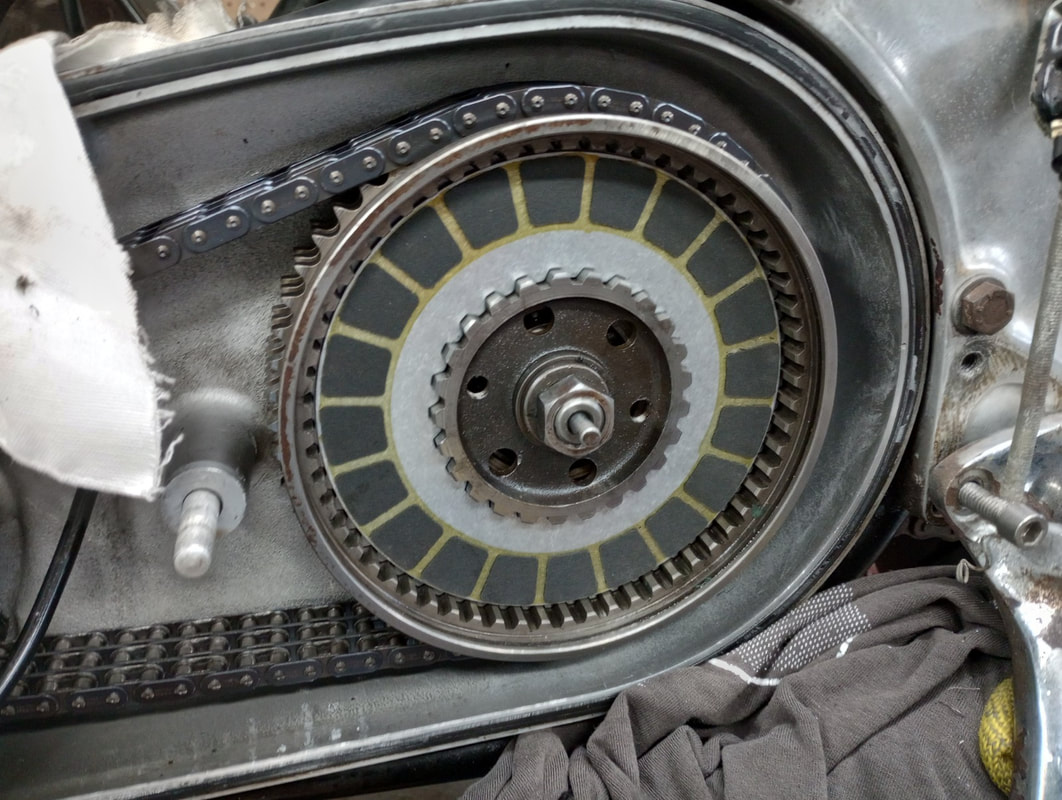
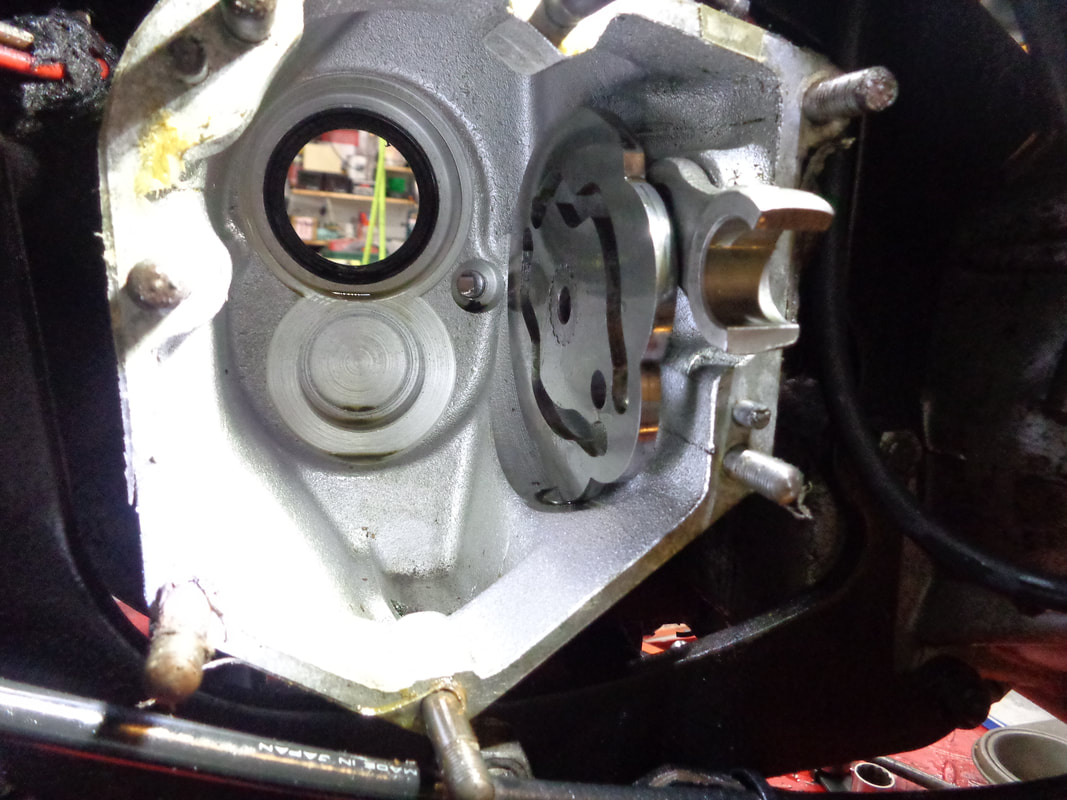
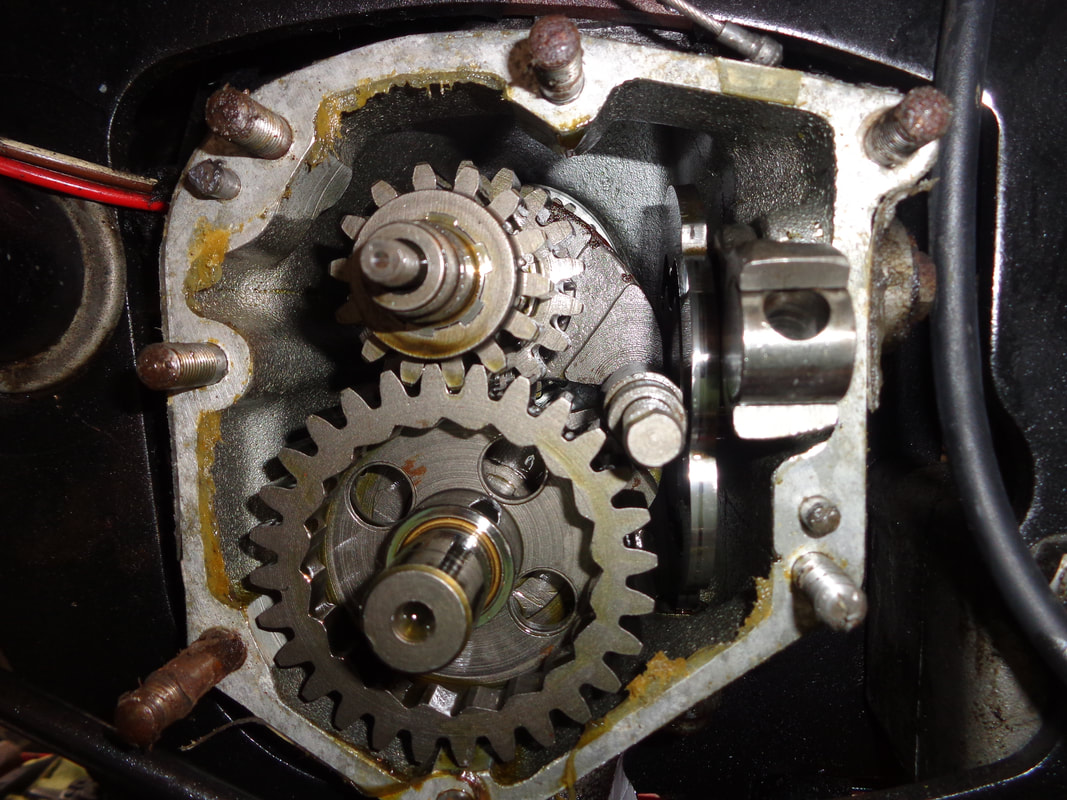
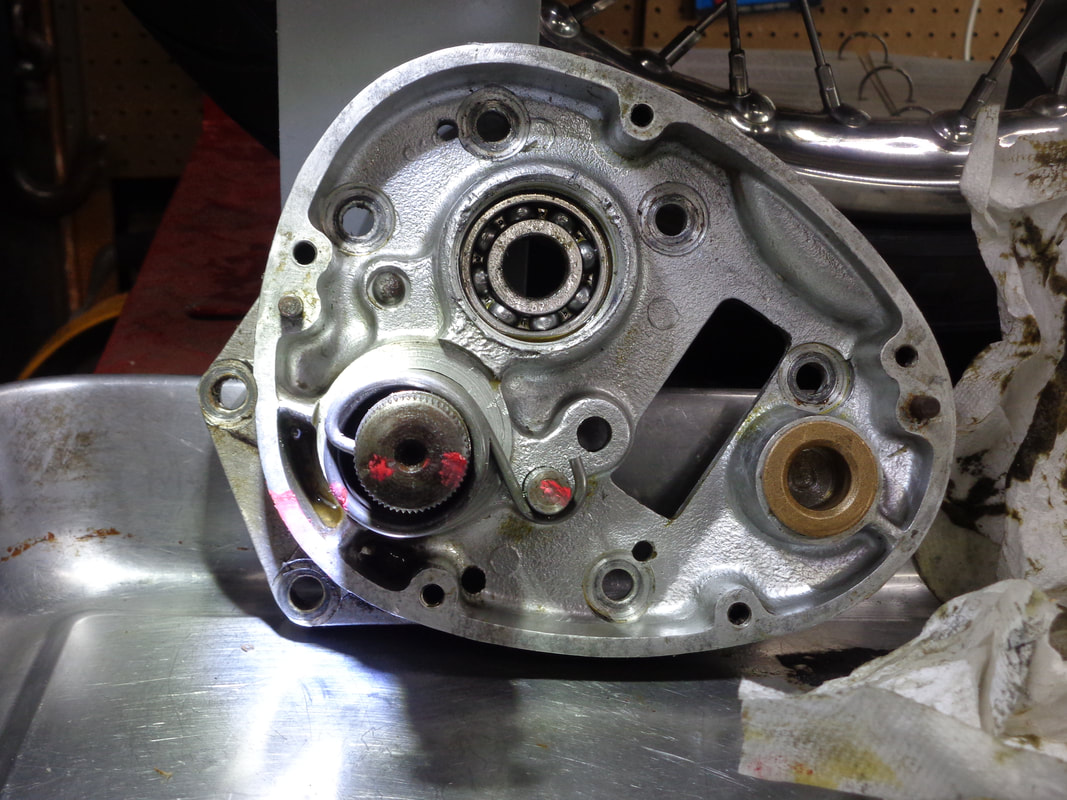
Gearbox woes:
The bike is currently parked. The gearbox is sloppy with a few bad false neutrals. I have a complete rebuild kit on hand from Andover Norton but I don't have the time right now to dive into this. Parked for a minute.
The bike is currently parked. The gearbox is sloppy with a few bad false neutrals. I have a complete rebuild kit on hand from Andover Norton but I don't have the time right now to dive into this. Parked for a minute.
August 2023
Painting:
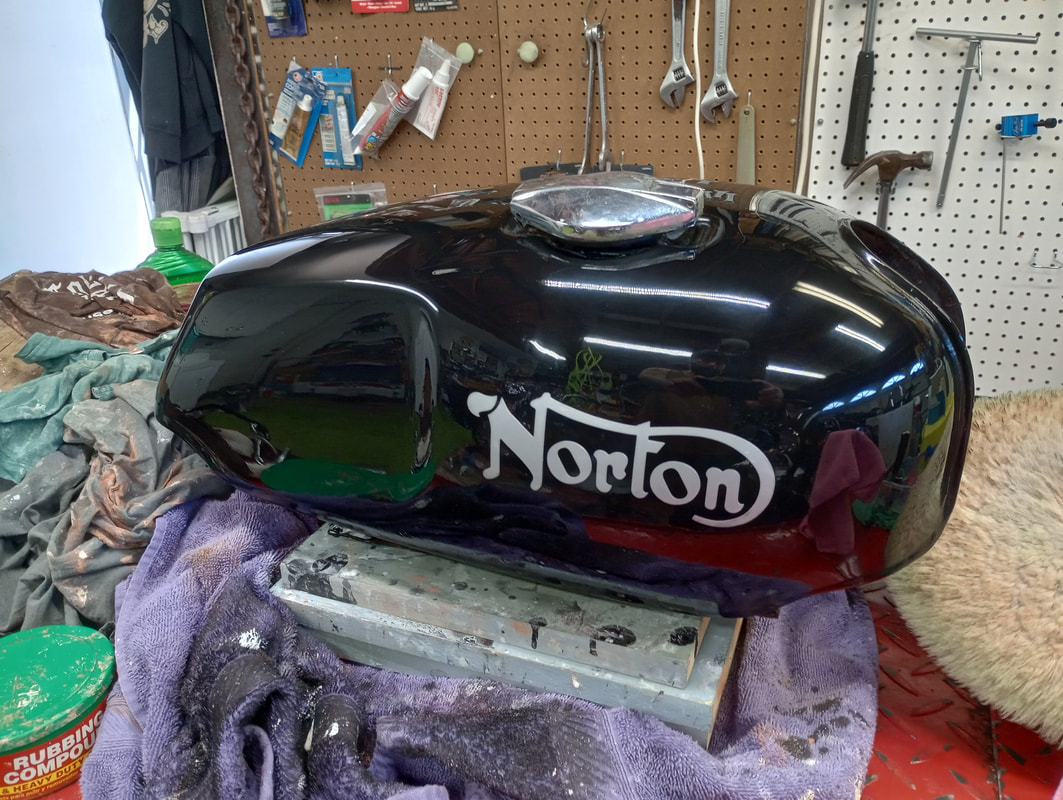
I now have 2 sets of tins for the Norton. I'm in the process of painting the yellow set black. I started with the tank which had some bad blistering on the top. Come to find that the blistering was from a large rusted hole, no good. I backyard patched that up with some JB weld and continued with the arduous painting process. It came out great, next to do the side covers.
I now have 2 sets of tins for the Norton. I'm in the process of painting the yellow set black. I started with the tank which had some bad blistering on the top. Come to find that the blistering was from a large rusted hole, no good. I backyard patched that up with some JB weld and continued with the arduous painting process. It came out great, next to do the side covers.
November 2023
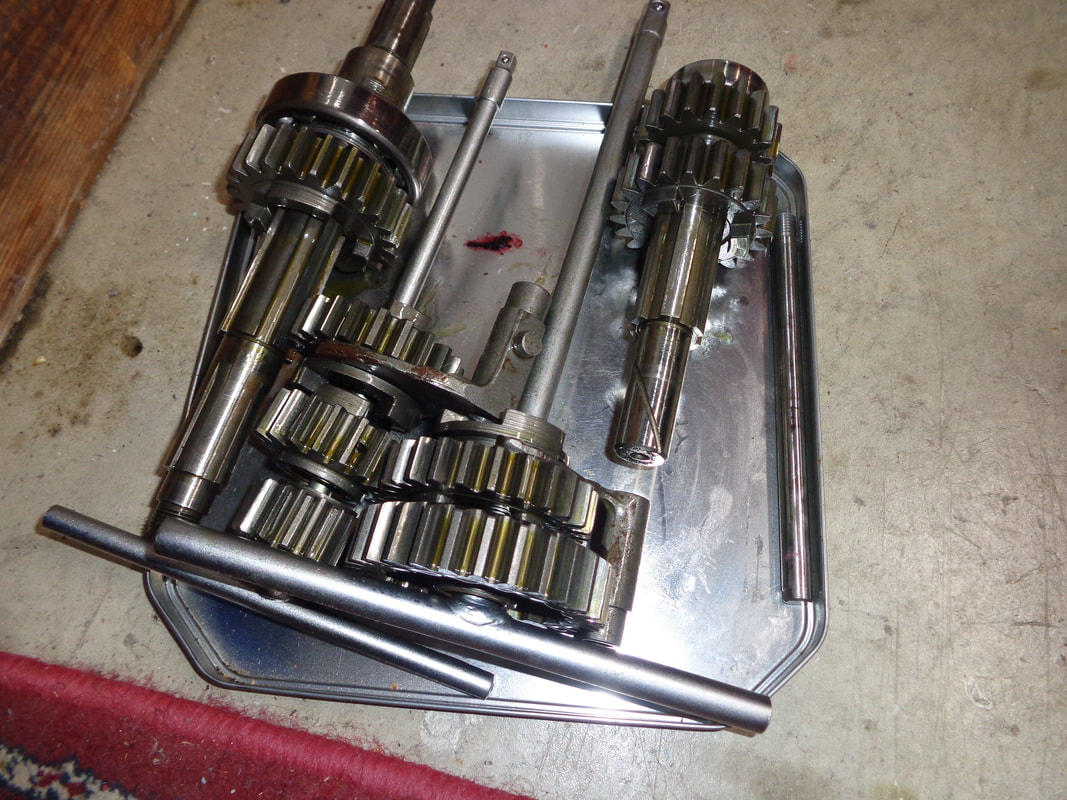
Gearbox:
Using an Andover Norton gearbox rebuild kit including bearings, springs, washers, gaskets, etc... I successfully cleaned up and rebuilt the 4 speed gearbox. Some of the bearings were worn and sloppy, but nothing to the failure point.
Using an Andover Norton gearbox rebuild kit including bearings, springs, washers, gaskets, etc... I successfully cleaned up and rebuilt the 4 speed gearbox. Some of the bearings were worn and sloppy, but nothing to the failure point.
|
|
January 2024
Handlebars:
Since acquiring the Norton, I have not been fond of the western style handlebars. Also, I was getting neck pain after riding the bike, I attribute this to my spine alignment riding the bike with the swept-back bars. After some careful deliberation, I sourced and installed new set of low bars - European style.
Along with the bars I added a new set of "Amal style" clutch and brake levers, a new small round chopper style mirror and a new set of Beston hand grips. Looking sharp.
Photos and details of the Norton will be added as the project matures.